Cabin Slipper Socks
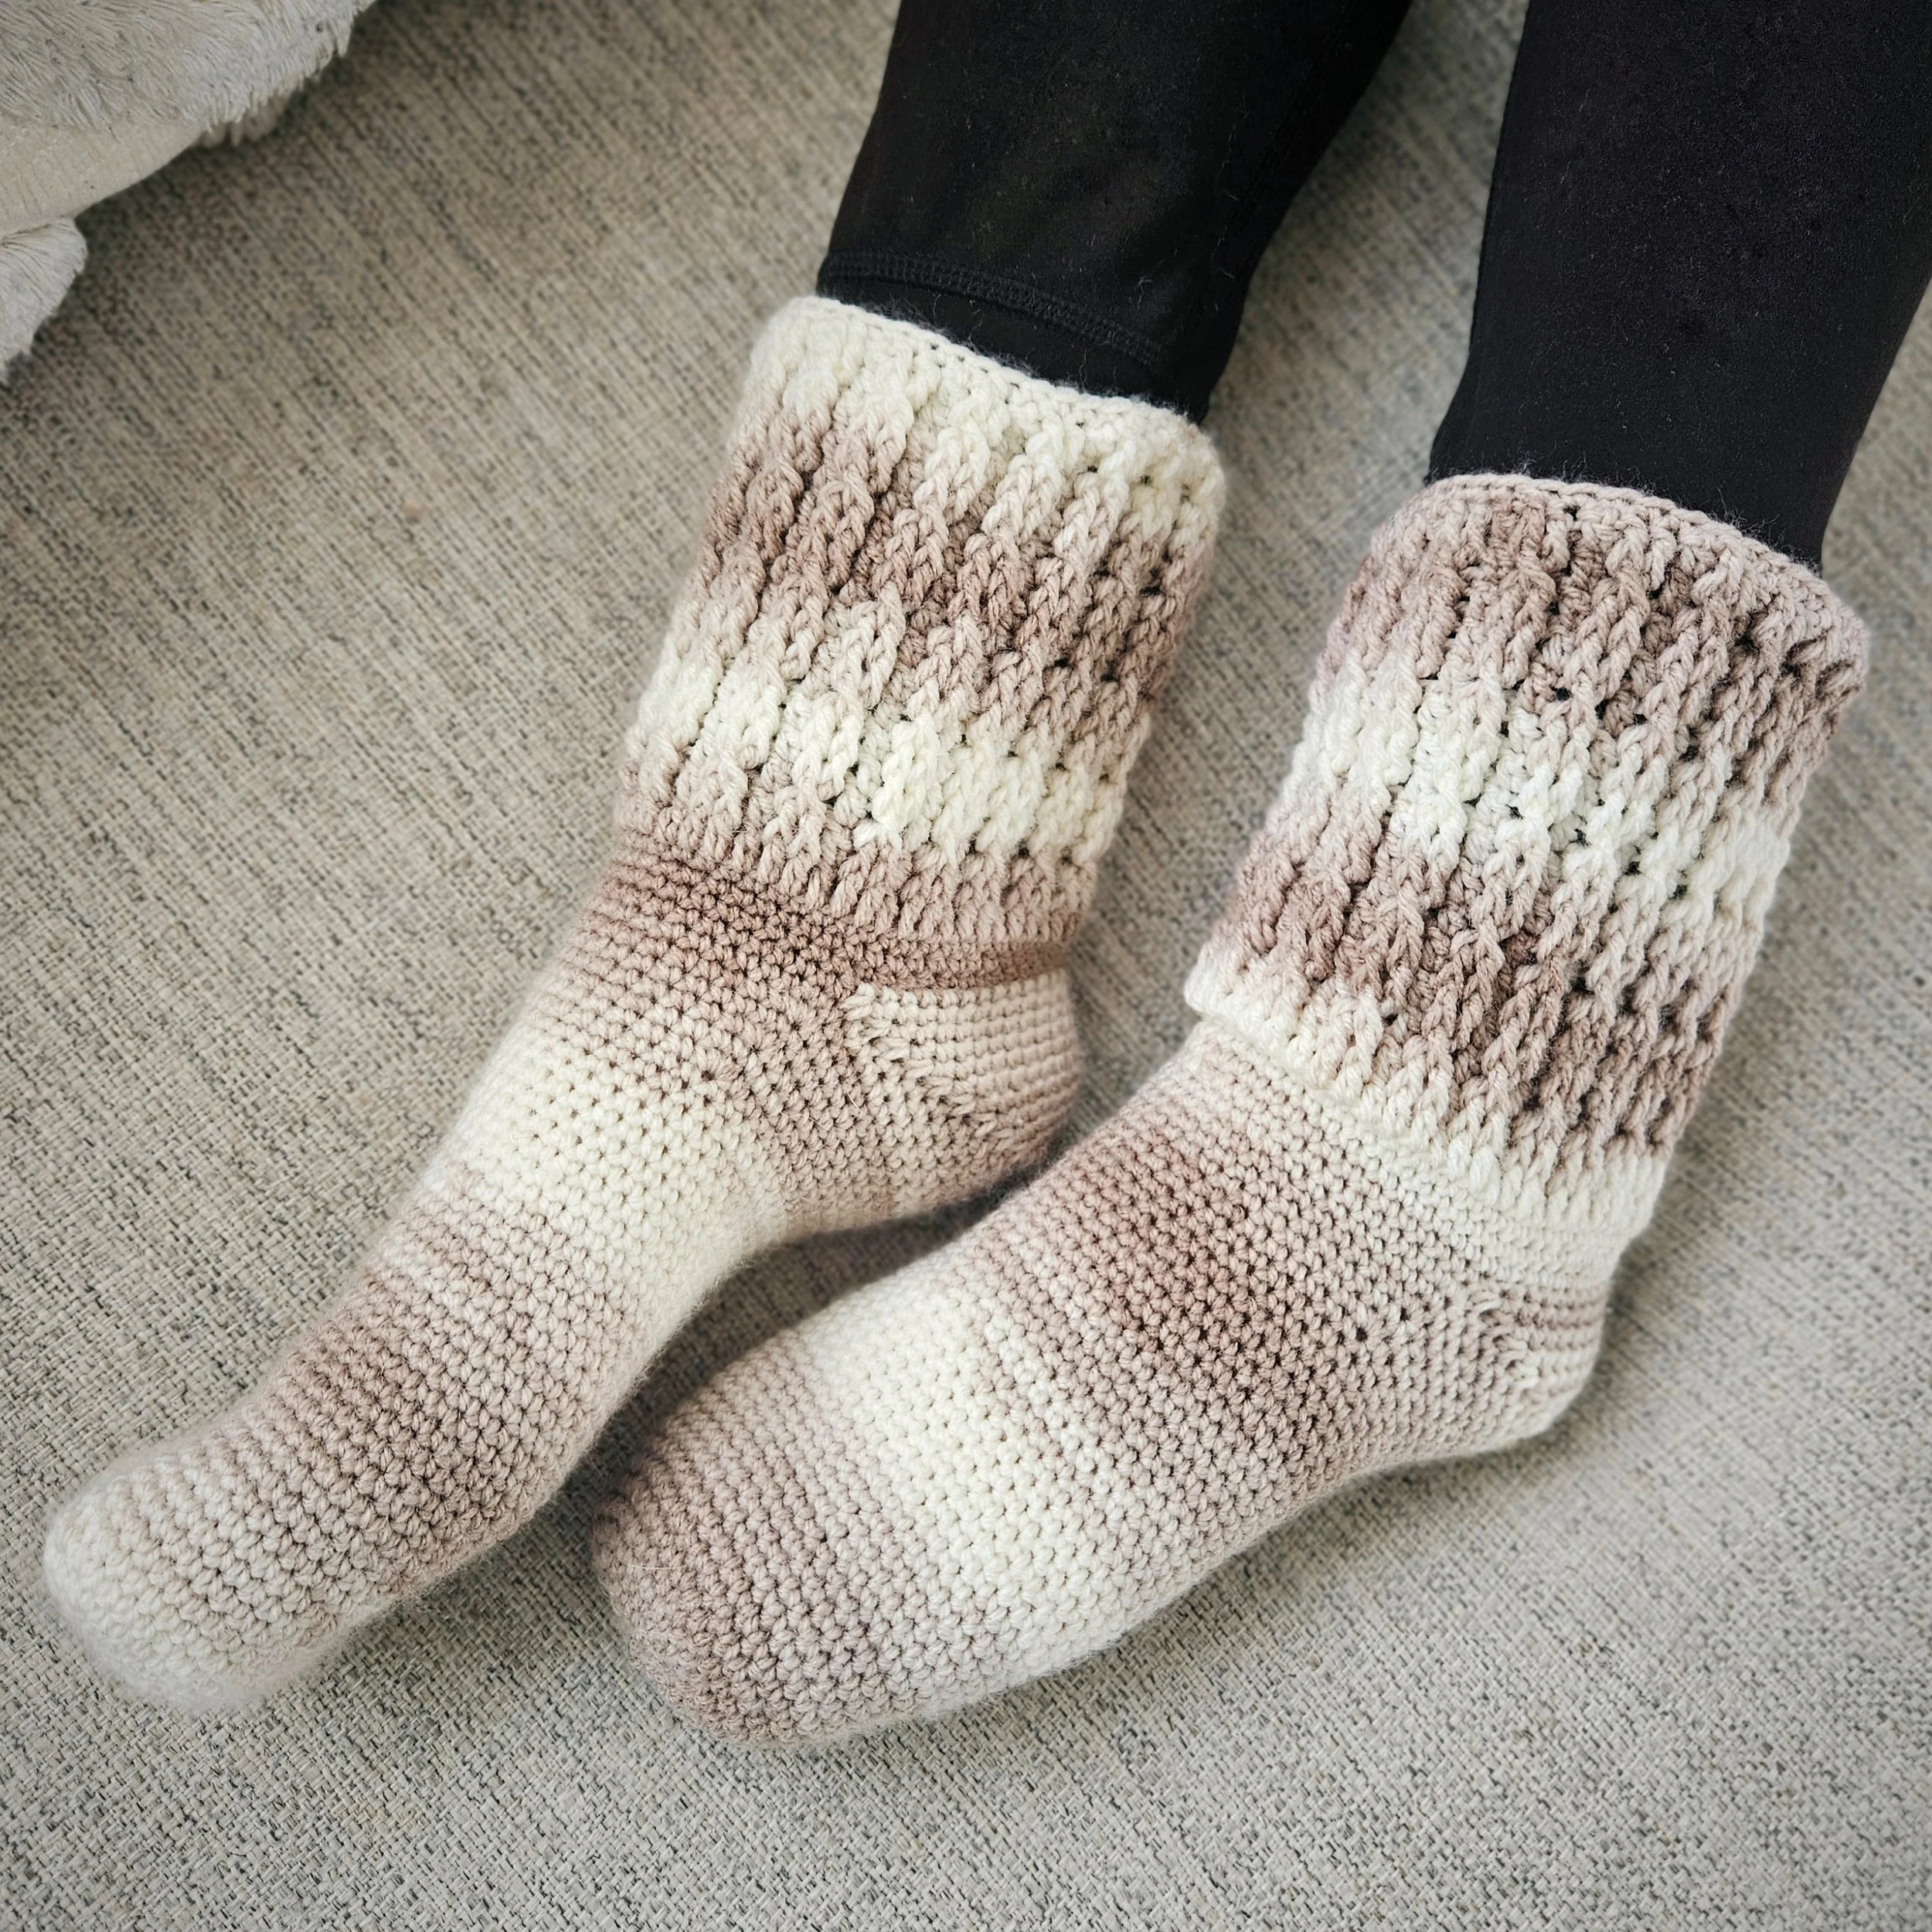
There is nothing better than slipping into a pair of cozy handmade socks after a long day. These Cabin Slipper Socks are warm, soft, and wonderfully simple to make, the kind of project that works up quickly and keeps toes happy all season long. With sizes from baby to adult XL, this pattern was designed so the whole family can enjoy a little extra comfort.
I am so excited to share that the Cabin Slipper Socks are featured in the Warm Your Feet Blog Hop! 🎉 That means you can grab the printable, ad-free PDF for free today only (the 26th) as part of the event. Click the download button below for your free PDF:

Then, you can return to the main blog hop page here:

Remeber to PIN this tutorial for later:

Just a heads-up: This blog post may contain affiliate links. Don't worry, though - these links are a win-win! They help support my site without costing you a penny extra. So, if you find something you love, clicking through won't just benefit me and my family, it'll also help you discover great products and resources.
Purchase the ad-free pattern
The ad-free, printable PDF file includes an exclusive picture tutorial and color coded sizes.
Difficulty
This pattern is rated Easy. It features a simple stitch pattern with minimal shaping.
Sizes
This pattern is written for each size based on approximate U.S. shoe sizes. When in doubt, refer to the finished measurements and select a size with some negative ease (somewhat smaller than your actual foot measurements).
Baby: child size 0 - 4
Toddler: child 5 - 9
Child: child 10 - 13
Teen: youth 1 - 3
Small: women’s 4 - 6.5
Medium: women’s 7 - 9.5; men’s 6 - 8.5
Large: women’s 10 - 12.5; men’s 9 - 11.5
X-Large: men’s 12 - 14
Finished Measurments
Centimeters given as: baby (toddler) child (teen) small (medium) large (x-large)
sock circumference: 9 (12) 15 (18) 18 (21) 24 (27)
sock length: 12 (16) 20 (22) 24 (26) 28 (31)
Inches given as: baby (toddler) child (teen) small (medium) large (x-large)
sock circumference: 13.5 (5) 6 (7) 7 (8.5) 9.5 (10.5)
sock length: 4.5 (6) 7.5 (8.5) 9.5 (10) 11 (12)
Yarn
You will need the following amounts of a DK weight (3) yarn for both socks:
Baby: 20 g (60 m / 50 yd)
Toddler: 30 g (105 m / 90 yd)
Child: 35 g (130 m / 105 yd)
Teen: 45 g (160 m / 135 yd)
Small: 50 g (180 m / 150 yd)
Medium: 65 g (220 m / 180 yd)
Large: 75 g (270 m / 220 yd)
X-Large: 90 g (320 m / 260 yd)
Sample pictured was made using Lion Brand Ice Cream Yarn in the color “coffee”, a 100% acrylic, DK weight (3) yarn that contains 360 m (394 yd) per 100g (3.5 oz)
While I love the self stripping yarn by Lion Brand, here are a few great alternatives:
Why it works: Soft, durable, and smooth. Perfect for wearable cozy socks that hold up to wear.
Price point: Mid-range, great value for quality DK weight without breaking the bank.
2. Yarn Citizen Harmony DK Yarn
Why it works: Plant-based cotton blend gives breathability and softness while still offering structure and stitch definition.
Price point: Moderate, slightly higher than basic DK, but worth it for natural fiber comfort
3. Brava Baby DK Yarn
Why it works: Soft acrylic with baby-friendly feel. Ideal if you want easy care or are making socks for kids.
Price point: Budget-friendly, one of the more affordable DK/medium options that still works nicely for socks.
Hook Size and Notions
Pattern Abbreviations
ch(s) - chain(s)
dc - double crochet
FPDC - front post double crochet
PM - place marker
rep - repeat
rnd - round
sc - single crochet
sc2tog - single crochet 2 together
sc3tog - single crochet 3 together
sk - skip
sl st - slip stitch
SM(s) - stitch marker(s)
sp - space
st(s) - stitch(es)
tch(s) - turning chain(s)
yo - yarn over
** - repeat instructions between asterisks as many times as directed
( ) - work a group of stitches all in the same stitch or space
(These are US crochet terms from the Craft Yarn Council)
Gauge
20 stitches and 25 rows in a 10 cm (4") square.
Note: Because this is a small project, working a separate gauge swatch is not necessary. Work several rounds of the pattern and then measure to check gauge.
Click HERE to learn more about gauge.
Special Stitches
Invisible Join
1. Cut the working end of your yarn and pull it up and through the last stitch that was worked.
2. Thread the tail of yarn through a tapestry needle.
3. Skip the first stitch, insert your tapestry needle into the second stitch from front to back through both loops of the stitch, pull yarn through.
4. Insert your tapestry needle from front to back into the back loop only of the stitch the yarn is originating from, pull yarn through.
5. Securely weave in your ends.
I have full video tutorial and blog post on how to create an invisible join.
How to Make a Magic Circle
The magic circle is an essential crochet technique that helps eliminate holes in projects worked in the round. If you’re not familiar with it yet, I have a full blog post and a step-by-step video tutorial to guide you through the process.
How to Crochet Even Circles
For simplicity, this pattern uses stacked increases in the round. When increases are stacked directly on top of each other, the sock toe may develop slight points. To avoid this, vary the number of starting stitches in each round before the first increase.
I have a full blog post and video tutorial to guide you through the process.
Video Tutorial
Notes
This sock is worked from the toe up in the round. The heel is added after the foot is complete using an afterthought heel.
This pattern is worked in un-joined rounds, use a stitch marker to mark the first stitch of each round.
A chain 3 at the beginning of a round counts as a double crochet stitch.
PM (place marker): Place a stitch marker in the stitch just before the instruction marked PM
Pattern is written as follows: baby (toddler) child (teen) small (medium) large (x-large)
Stitch counts are given at the end of each row as follows: {baby, toddler, child, teen, small, medium, large, x-large}
Unlock Your Free Pattern with Grow.me!
Want to access this free crochet pattern? Simply sign up for a Grow.me account with your email address!
By signing up, you’ll get access to this pattern and future free ones, plus updates on new designs and crochet tips. It’s a great way to stay in the loop and support my work, all while enjoying awesome crochet patterns! It's super quick and easy—just follow these steps:
Enter Your Email
Type in your email and click “Unlock Pattern.” That’s it!Check Your Inbox
You might get a quick confirmation email—just click the link to finalize your account.Start Crocheting
Once you’re signed up, you can view the pattern and start crafting right away!
Please note: Grow.me manages all account-related issues, including password resets. I do not have access to help with lost passwords, so please make sure you keep your account information safe!
Pattern
Share Your Work!
You’ve put in a lot of effort to create your Cabin Slipper Socks, and you should be proud of your achievement! Share your pictures using #stitchandhoundcrochet to connect with the community and receive support and feedback. Don’t forget to check out the social links below!
Pattern Support
If you have any questions or need a little extra help with your Cabin Slipper Socks, don’t hesitate to reach out! Join the Stitch and Hound Facebook group! for pattern support, tips, and a wonderful community of fellow crocheters. It’s the perfect place to ask questions, share your progress, and connect with others who are crafting along with you. I’m there to offer help and support every step of the way!