Crochet Gauge Explained
Mastering crochet gauge is the key to creating beautiful projects that are the intended size and shape. In this guide, we'll explain the importance of gauge and how to measure it properly. Whether you're a beginner or seasoned crocheter, understanding crochet gauge is essential for achieving professional-looking results. By the end of this guide, you will be empowered to create with confidence and precision.

Just a heads-up: This blog post may contain affiliate links. Don't worry, though - these links are a win-win! They help support our site without costing you a penny extra. So, if you find something you love, clicking through won't just benefit us, but it'll also help you discover great products and resources!
Pin this post to save it or read it later

What is crochet gauge?
Gauge is a measurement of how tightly or loosely you crochet, which is known as tension.
Why does crochet gauge matter?
Everyone crochets differently. Some people crochet with loose tension, while some crochet with tight tension. Your crochet tension changes 2 things:
1. The size of your project

Both of the above swatches were crocheted using a 4.5mm hook. The swatch on the left was crocheted with tight tension, while the one on the right was crocheted with loose tension. As you can see, how tightly or loosely you crochet makes a big difference in the size of your project.
Now imagine a designer who crochets with tight tension creates a sweater. You can follow the pattern exactly as written, however, if you crochet the sweater with loose tension, your sweater will turn out much larger than the designer’s. (Inversely, if you crochet with tight tension while the designer crochets with loose tension, your sweater will be much smaller than the designer’s.)
2. The amount of yarn needed to complete your project
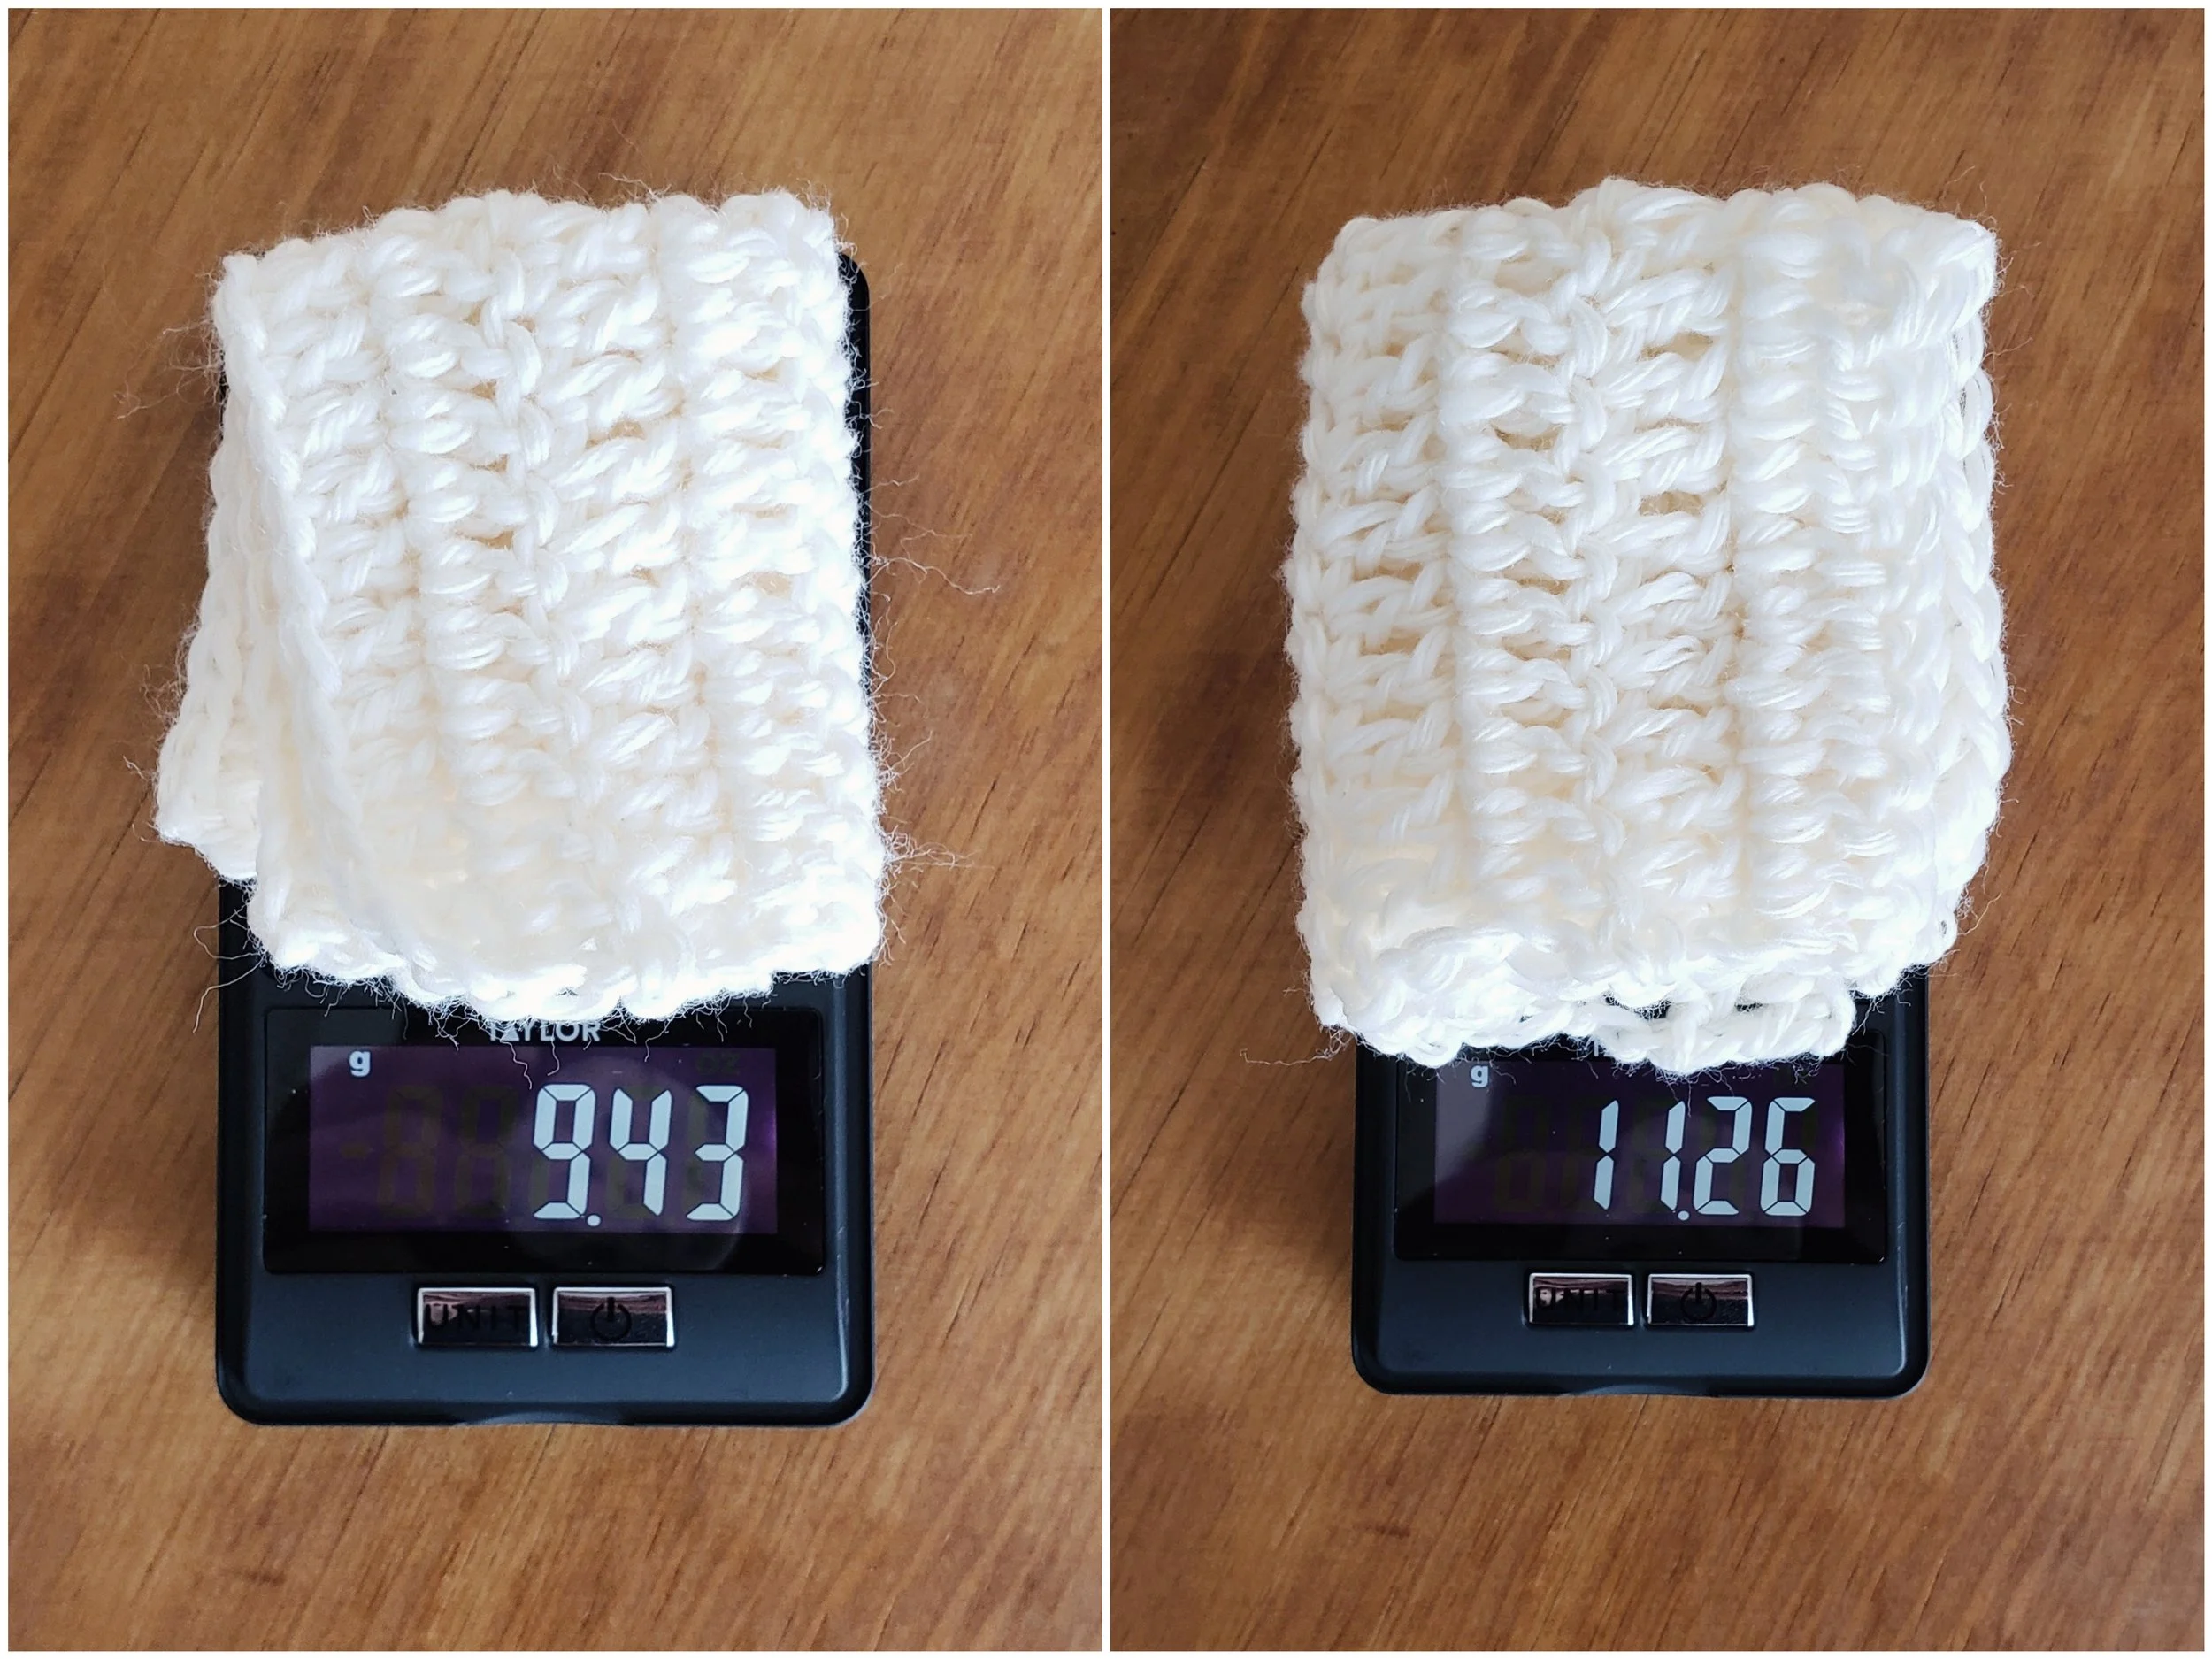
The swatch on the right that was crocheted with tight tension used 9.43 grams of yarn, which is approximately 19 yards of this particular yarn. The swatch on the left that was crocheted with loose tension used 11.26 grams of yarn, which is approximately 22 yards of this particular yarn.
Even in just a 4″ by 4″ square, the swatch that was crocheted with loose tension used 3 more yards of yarn than the swatch crocheted with tight tension! When an entire garment is being created, the difference in amount of yarn quickly adds up.
Now imagine a designer who crochets with tight tension creates a sweater. You can follow the pattern exactly as written, however, if you crochet the sweater with loose tension you will need much more yarn than the designer has listed in the pattern to complete your sweater. (Inversely, if you crochet with tight tension while the designer crochets with loose tension, you will be left with a lot of yarn left over.)
So, how do I know if I am crocheting with the same tension as the designer?
Since everyone crochets differently, chances are you are never crocheting with the same tension as the designer of a pattern. However, we can crochet with whatever tension we like and still work up a pattern that is the intended size. This is where gauge comes in.
Gauge is written in a pattern as the number of stitches and rows in a given area, usually a 4″ x 4″ (10cm x 10cm) square.
Measuring Crochet Gauge

A gauge swatch is a square worked up in the same stitch pattern as the project you are creating. Even though gauge is given as a 4″ by 4″ square, you should create a gauge swatch that is slightly larger than 4″ by 4″ because it is more accurate to measure the number of stitches and rows in the center of the swatch.
As you can see from the picture on the left, there are 15 double crochet stitches in 4″. The picture on the right shows up that there are 7 rows of double crochet stitches in 4″. This gives us a gauge of 15 stitches x 7 rows = 4″.
You want to make sure your gauge swatch matches the gauge of the pattern.
If my gauge does not match the pattern, how can I change my gauge?
You can change your gauge with different crochet hook size

Each of the above swatches were crocheted with the same tension, but different hook sizes. From left to right they were made using a 4mm, 5mm, and 6mm crochet hook. As you can see, crochet hook size changes the number of stitches and rows in a gauge swatch.
What to do if you have FEWER stitches and rows than the gauge of the pattern
Your gauge swatch has 15 stitches x 7 rows in 4″, but the gauge listed in the pattern is 17 stitches x 8 rows in 4″
This means that your gauge swatch is smaller than the designer’s. To fix this, you need to re-create the gauge swatch using a larger hook. Try increasing your hook size by 0.5mm until your gauge matches the patterns. For example, if the pattern recommended using a 5.0mm hook, you should try using a 5.5mm hook, then a 6.0mm hook, etc. until you reach gauge.
What to do if you have MORE stitches and rows than the gauge of the pattern
Your gauge swatch has 15 stitches x 7 rows in 4″, but the gauge listed in the pattern is 13 stitches x 6 rows in 4″
This means that your gauge swatch is larger than the designer’s. To fix this, you need to re-create the gauge swatch using a smaller hook. Try decreasing your hook size by 0.5mm until your gauge matches the patterns. For example, if the pattern recommended using a 5.0mm hook, you should try using a 4.5mm hook, then a 4.0mm hook, etc. until you reach gauge.
That’s it!
I hope that was easy to understand! If you still have questions about gauge, please leave a comment and I will try my best to make sure you are completely confident when it comes to gauge.
Lion Brand’s Comfy Cotton Blend was used to create all gauge swatches in this tutorial