How to Make a Crochet Invisible Join
Over time, I've encountered a few crochet techniques that have truly changed the way I crochet. The crochet invisible join is one of these techniques. Unlike a traditional slip stitch join that may leave a visible line or bump, the invisible join allows you to seamlessly join rounds. This is especially significant when making amigurumi or baskets where a slip stitch join is very noticeable.
Make sure to PIN this tutorial if you want to save it for later:

Just a heads-up: This blog post may contain affiliate links. Don't worry, though - these links are a win-win! They help support my site without costing you a penny extra. So, if you find something you love, clicking through won't just benefit me and my family, it'll also help you discover great products and resources.
Why Choose the Crochet Invisible Join Over a Slip Stitch
Here is a picture of an invisible join on the left compared to a slip stitch join on the right:
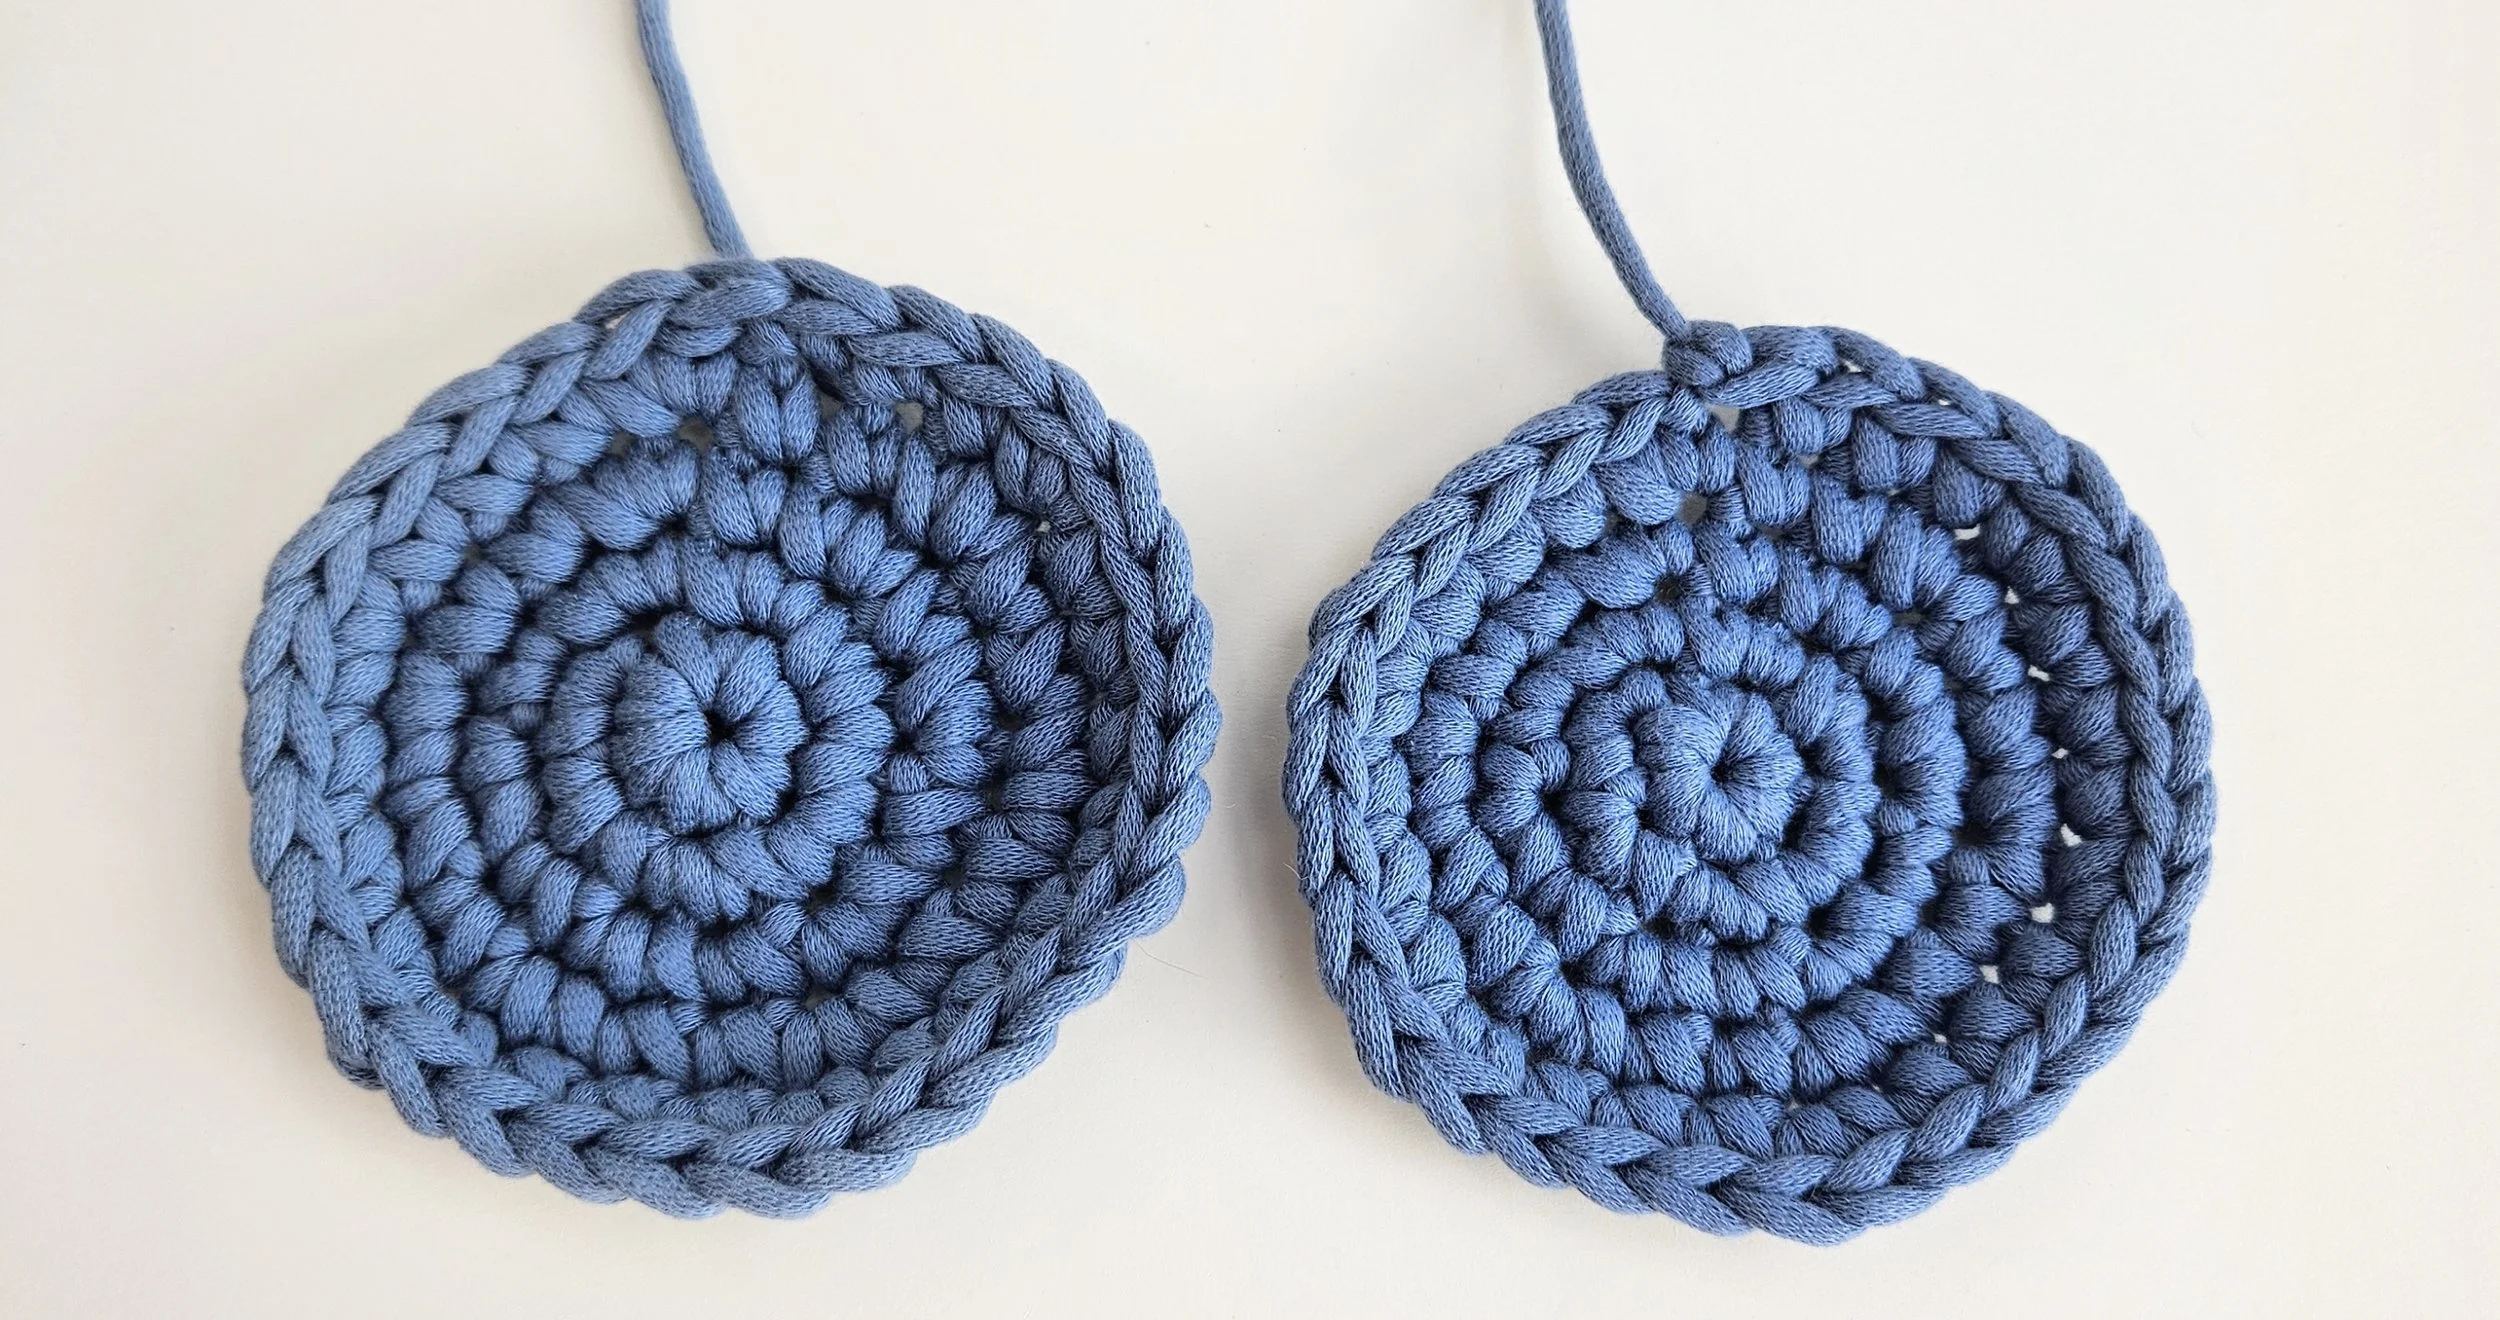
You can see how much smoother and nicer the invisible join looks!
There is also a lesser-known benefit to using an invisible join. Unlike the slip stitch join, which can introduce tension and stress points into your crochet work, the invisible join distributes tension more evenly. The result is a stronger and more durable finished product, particularly beneficial for items subjected to frequent use or washing (such as crochet kid’s toys!)
Did you also know that an invisible join can also be used to manage color changes between rounds? Transitioning to a new color at the onset of a fresh round often leads to an undesired "jog" effect. This phenomenon manifests as a slight blending of the previous round's color into the subsequent one, resulting in a somewhat untidy appearance for your projects. Instead of changing colors in a traditional manner, you can use a seamless join to finish off a round and then join your new color in any stitch.
Crochet Seamless Join Video Tutorial
For those who prefer visual demonstrations, I've created a video tutorial on YouTube before we dive into the written instructions.
Crochet Seamless Join Written Instructions
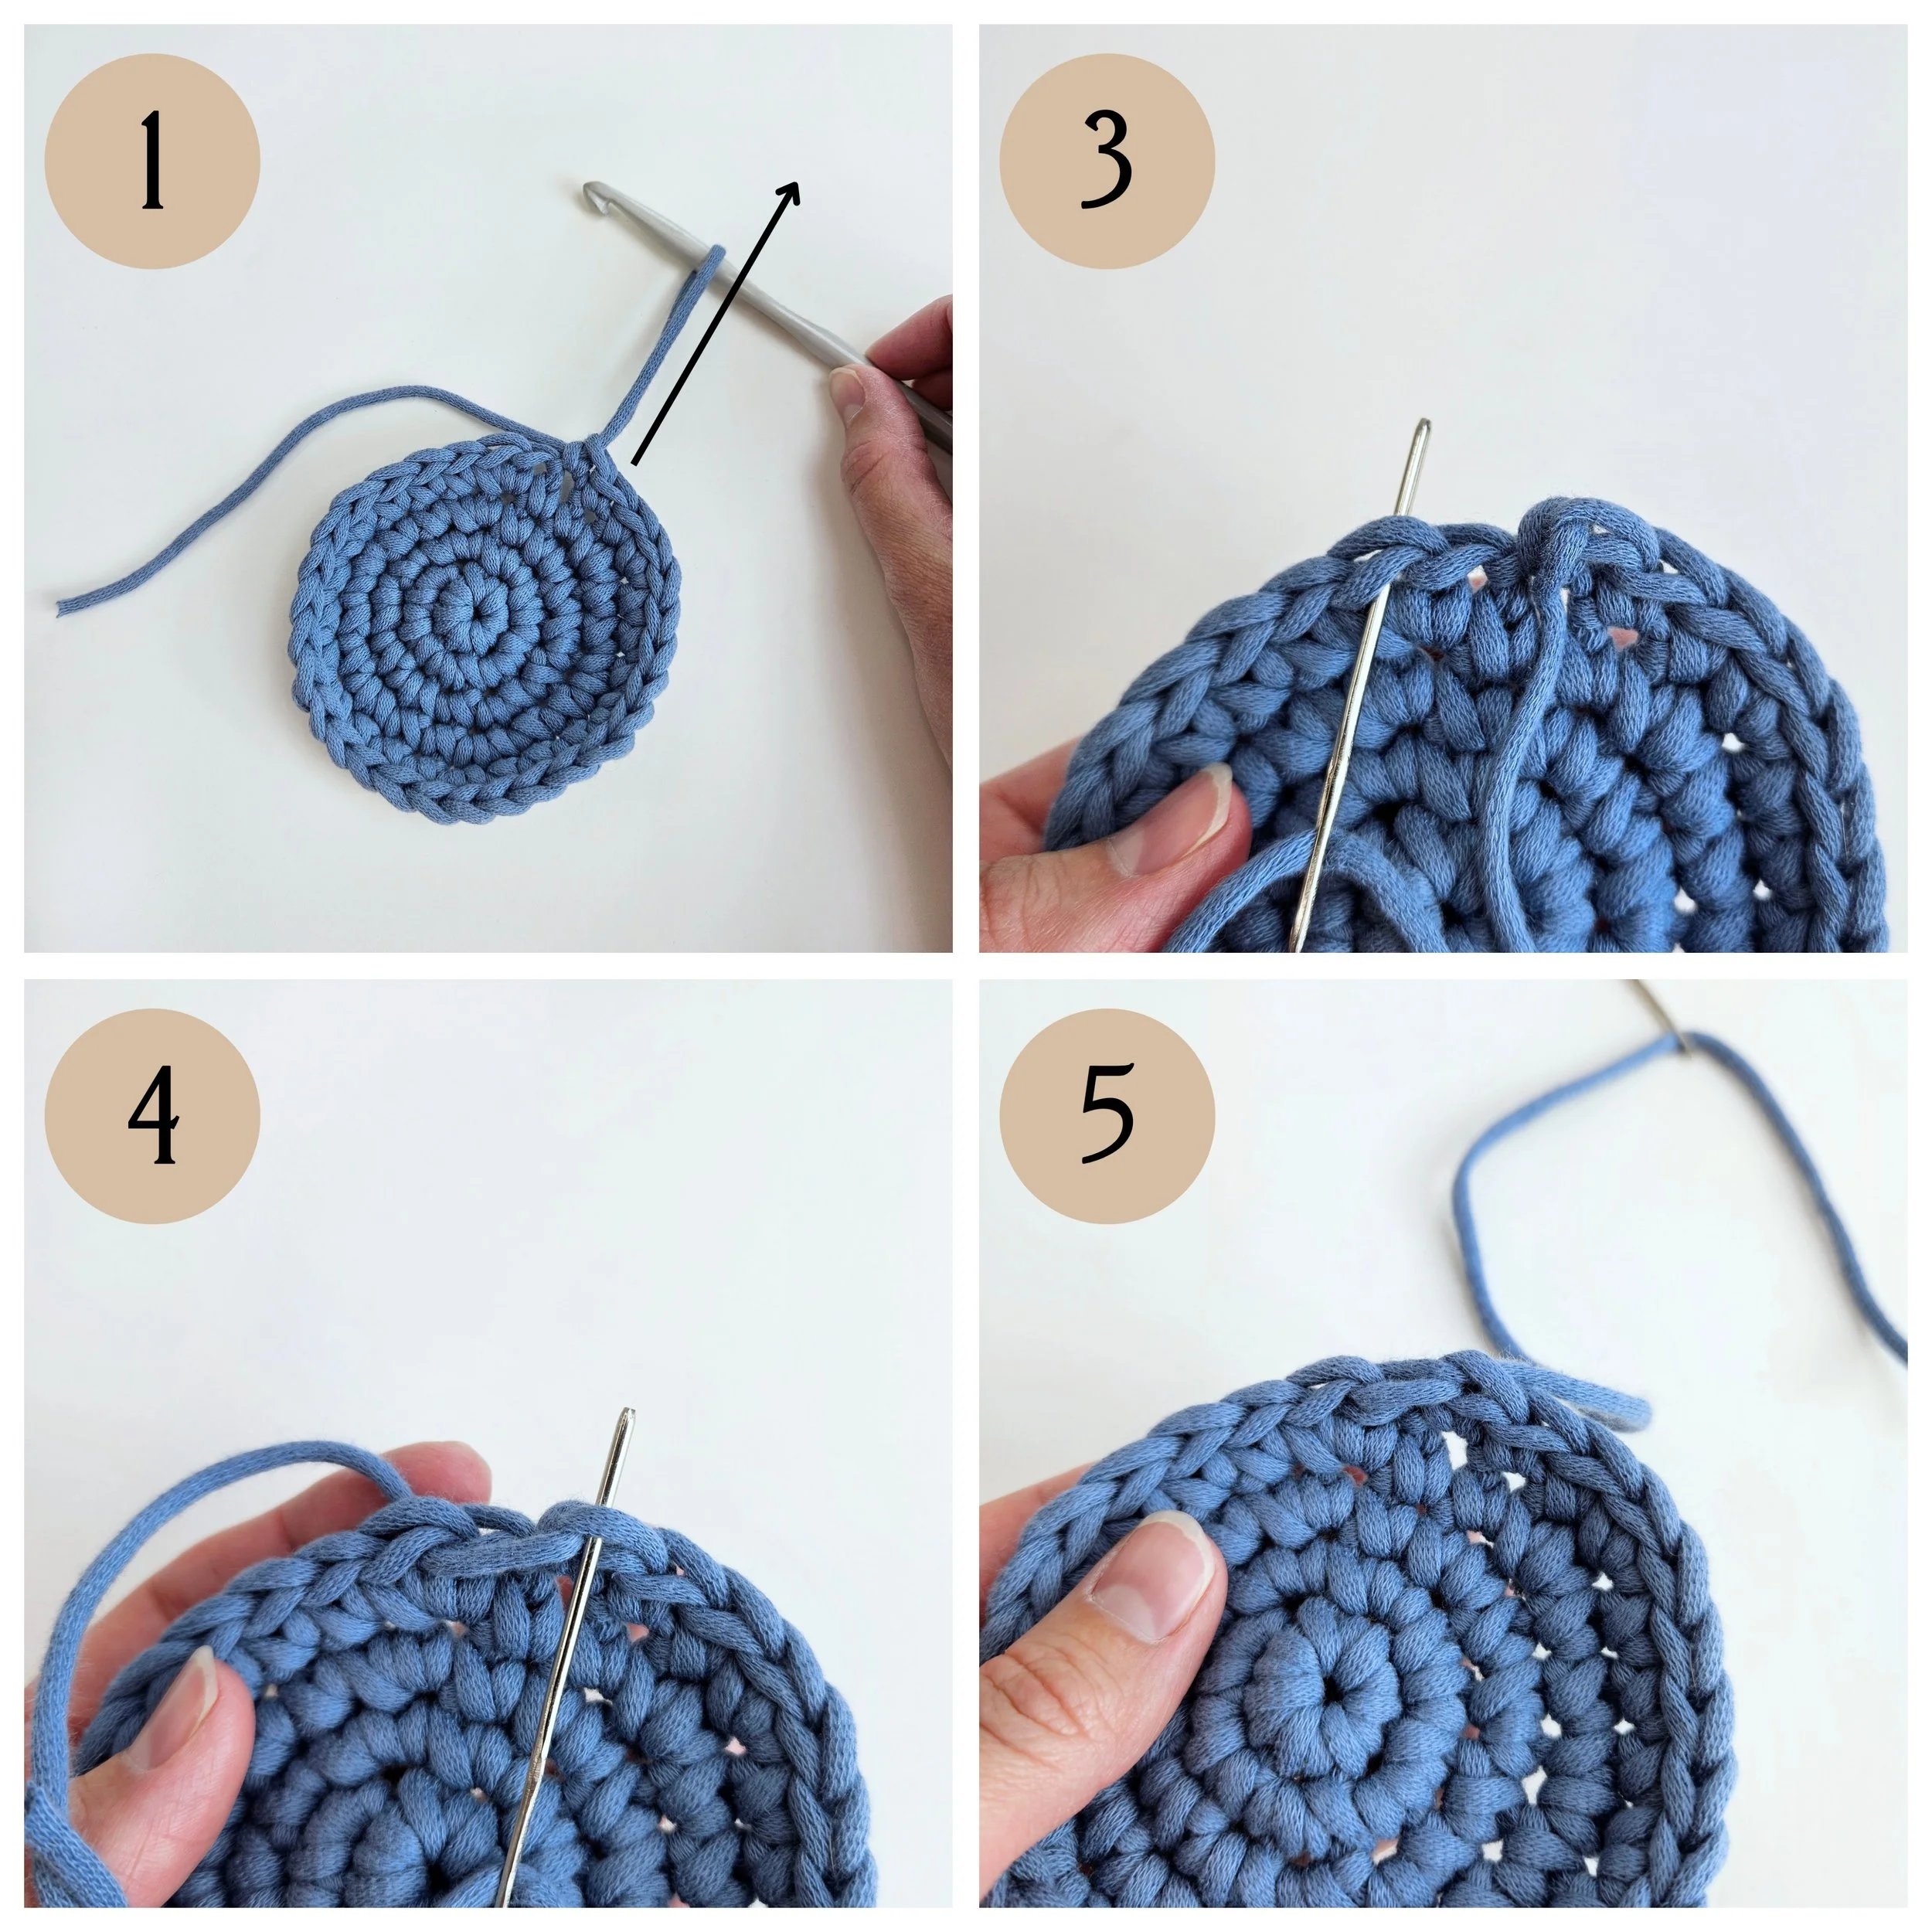
Cut the working end of your yarn and pull it up and through the last stitch that was worked
Thread the tail of yarn through a tapestry needle.
Skip the first stitch, insert your tapestry needle into the second stitch from front to back through both loops of the stitch, pull yarn through.
Insert your tapestry needle from front to back into the back loop only of the stitch the yarn is originating from, pull yarn through.
Done! Don’t forget to securely weave in your ends.
Crochet Seamless Join Troubleshooting
Maintain Stitch Counts with Care:
Proper stitch counts are the cornerstone of every pattern. The invisible join introduces a new stitch that replaces both the slip stitch and the last stitch of the round. As such, it's important not to pull the yarn too tightly when completing the invisible join because this can cause the stitch created by an invisible join to disappear and your stitch counts will be off by 1. Pull gently, just enough to create a stitch that matches your other stitches in width.
Navigating Pattern Instructions:
When your pattern calls for working into the first stitch of a round, you should work into the stitch created by the crochet invisible join.
Conclusion
Mastering the invisible join technique opens up a world of possibilities for seamlessly finishing off your crochet projects. Whether you're working on garments, accessories, or home decor items, this technique will elevate the quality of your work and give it a polished, professional finish.
More Beginner Friendly Crochet Tutorials:
