How to Crochet a Foundation Chain (Plus How to Fix a Tight Foundation Chain)
Welcome to Learn to Crochet!
This lesson is part of my Learn to Crochet email course, where I walk you through the fundamentals of crochet step by step while you make your own market bag.
If you're following along with the email course, this is Week 2. If you found this lesson on your own, welcome! You can work through the lessons at your own pace or join the free email course to have each lesson delivered to your inbox.
Let's get started!
Now that you know how to hold your crochet hook and yarn, it's time to start crocheting.
Almost every crochet project begins the same way: you'll make a slip knot, crochet a foundation chain, and work your first row of stitches into that chain.
Watch the Video Tutorial
These first movements are much easier to understand when you can see them in action. Watch the video below first, then use this guide as a reference while you practice.
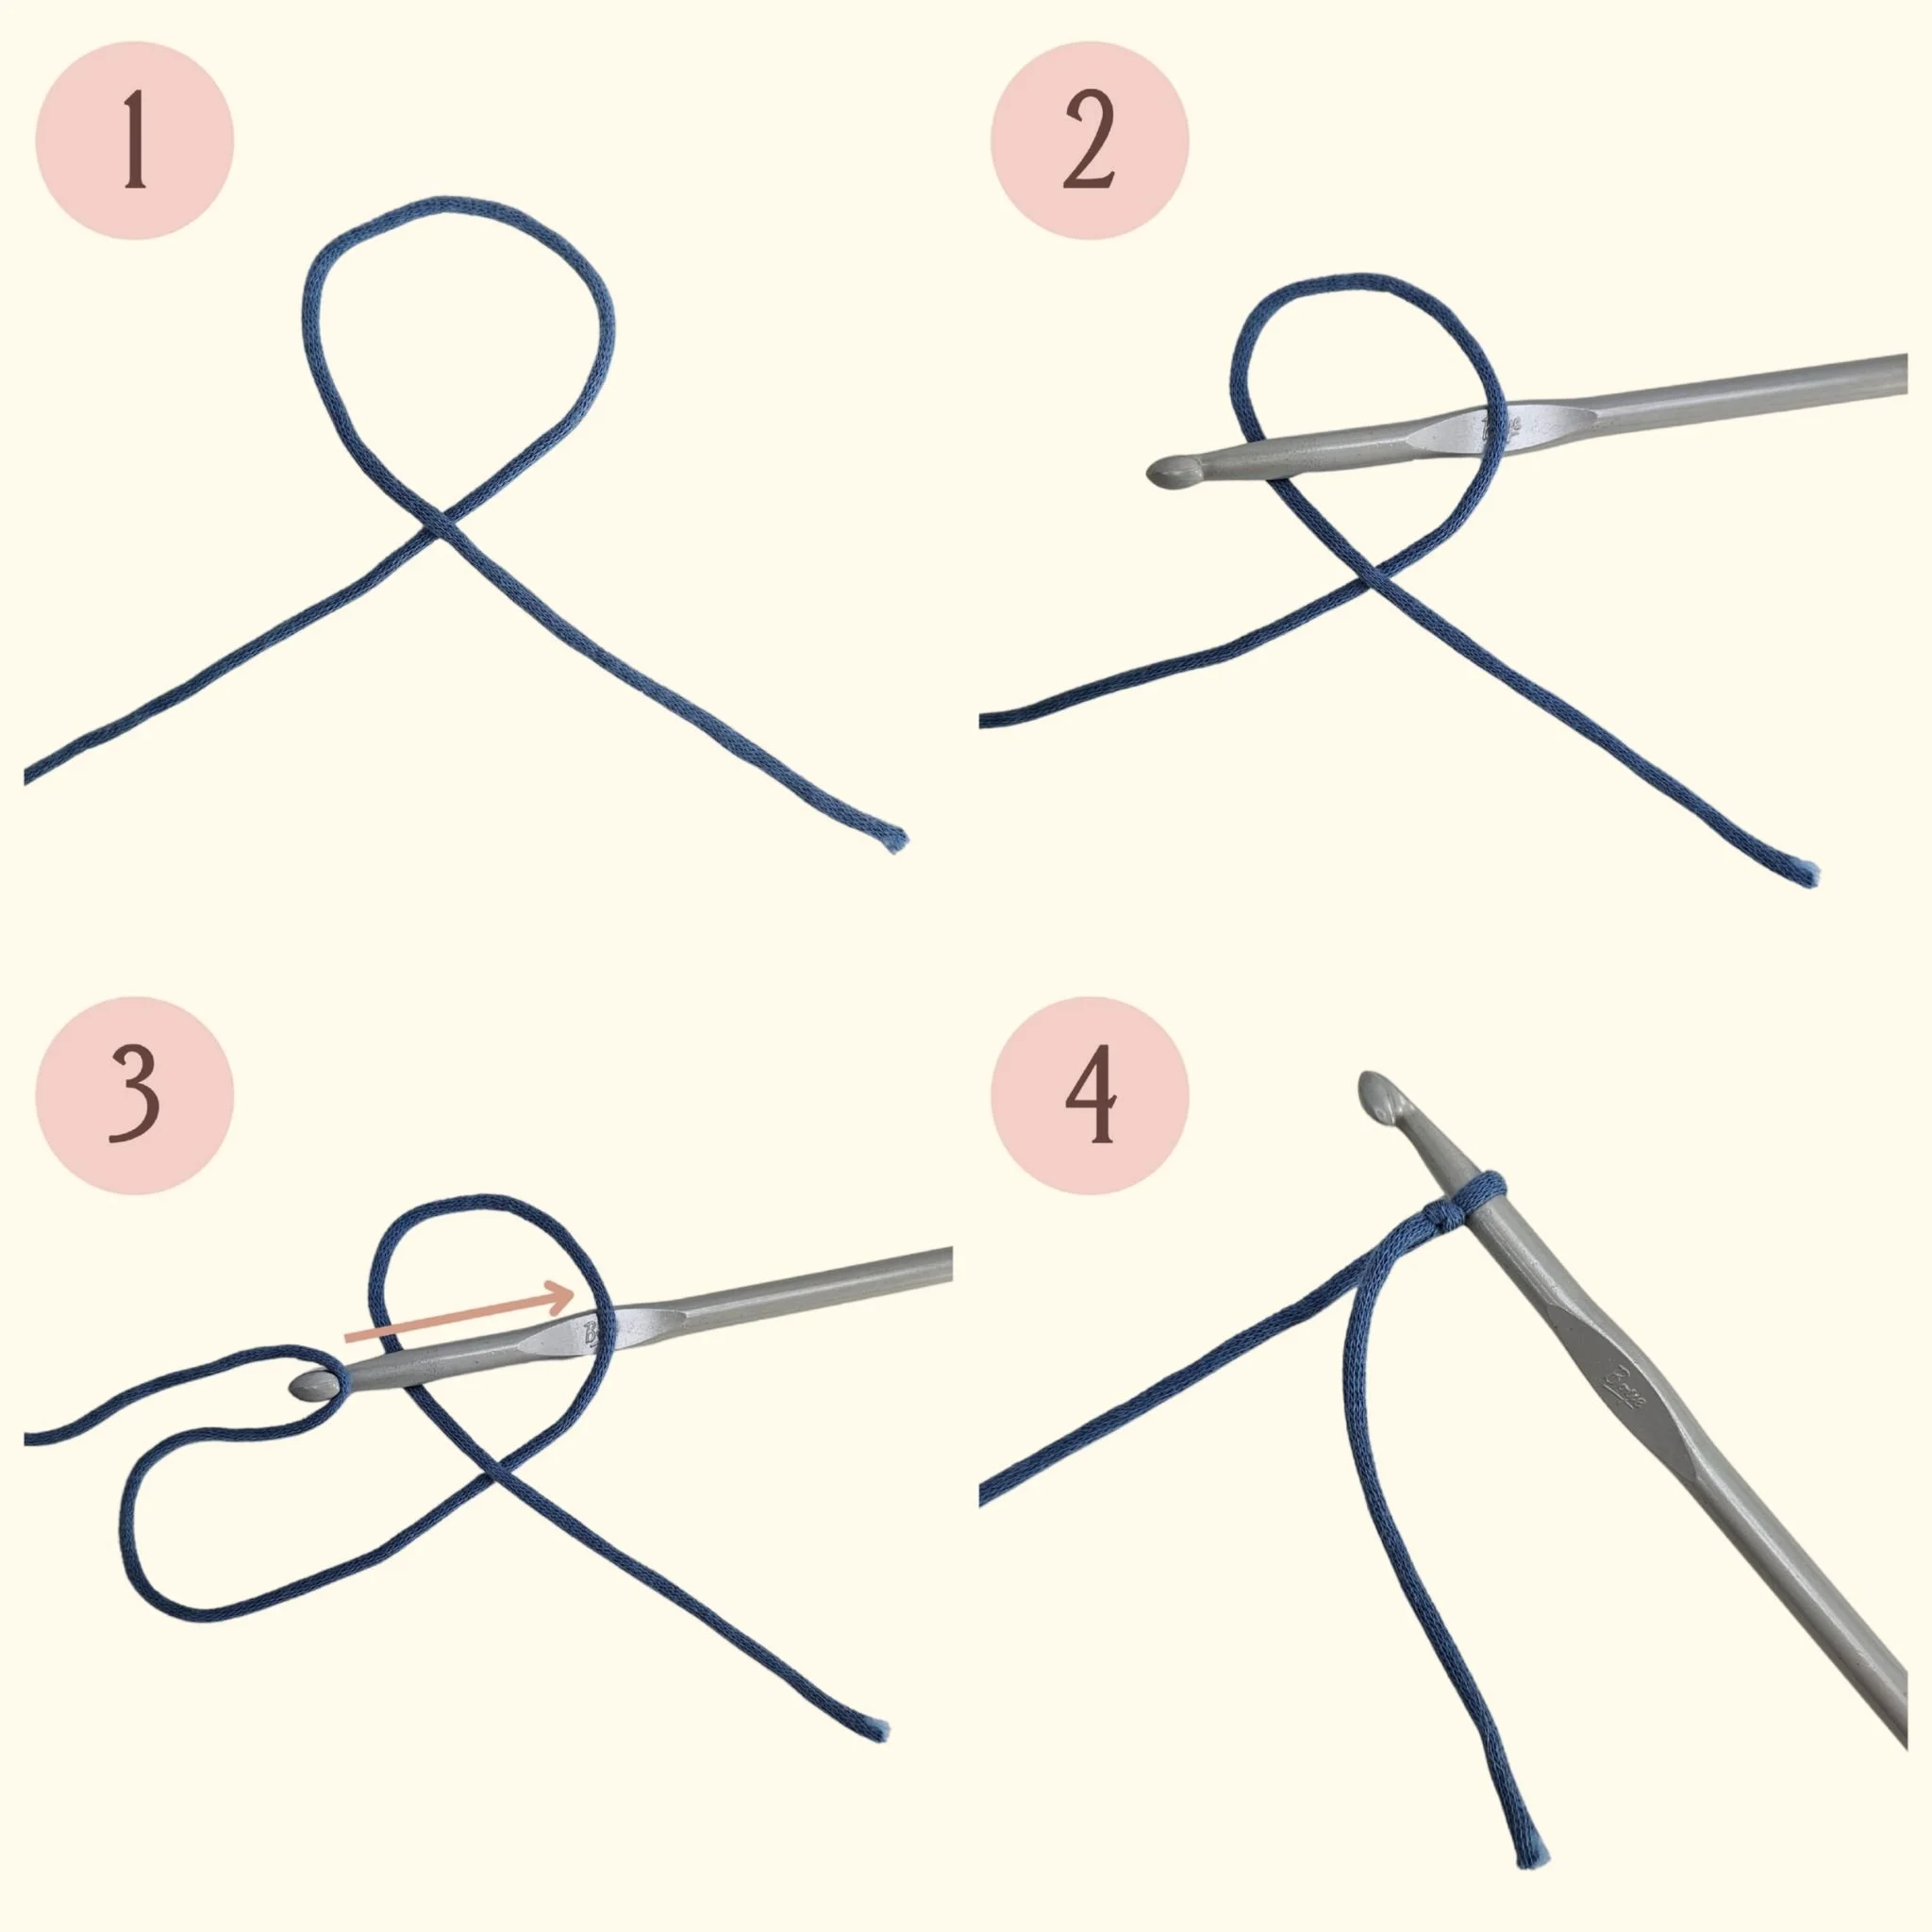
Step 1: Make a Slip Knot
A slip knot is the adjustable loop that goes onto your crochet hook before you begin crocheting.
To make a slip knot:
Make a loop with your yarn.
Pull the working yarn through the center of the loop with your finger or crochet hook.
Place the new loop onto your crochet hook.
Gently tighten the loop until it rests comfortably on the hook.
Your slip knot should slide easily along the hook. If it's difficult to move, loosen it slightly. If it falls off the hook, tighten it just enough to stay in place.
Step 2: Crochet a Foundation Chain
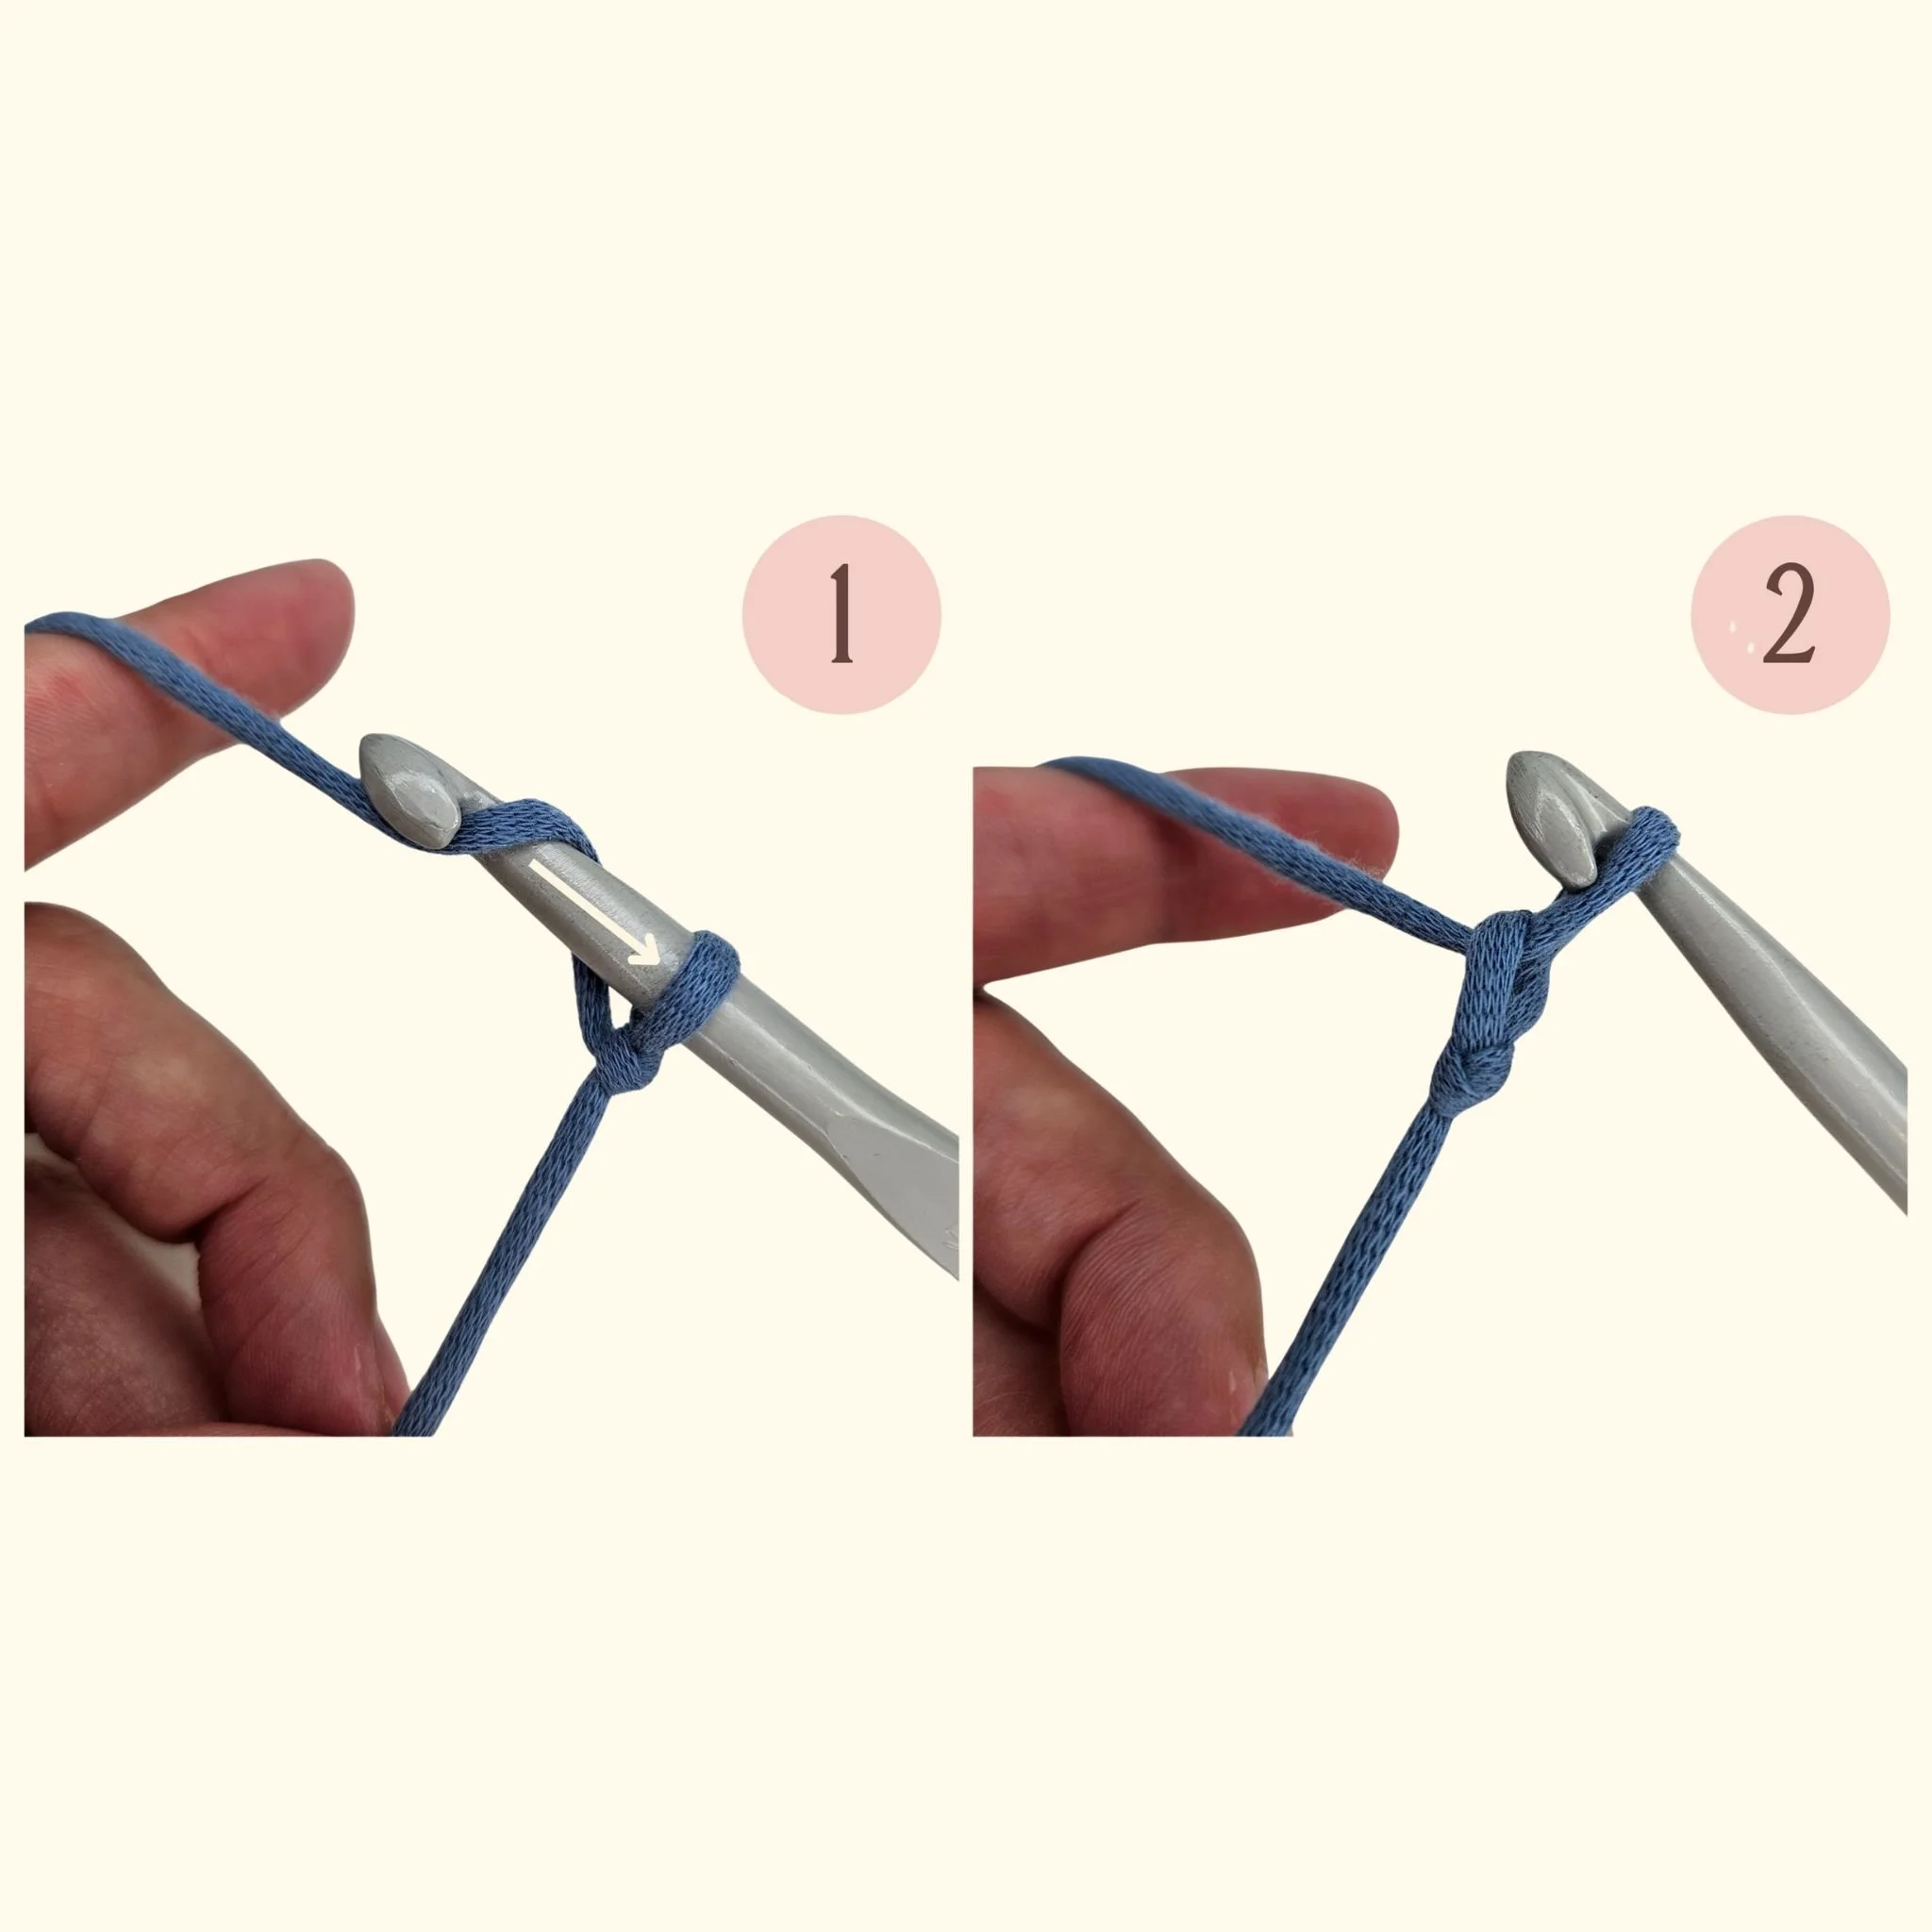
A foundation chain is simply a row of chain stitches that creates the starting edge of your crochet project.
To make a chain stitch:
Start with your slip knot on the hook and wrap the yarn over the hook from back to front. This is called a yarn over.
Pull the hook through the loop already on your hook.
You've made one chain stitch. Repeat until you've made the number of chains your pattern calls for.
Try to make each chain about the same size. They don't need to be perfect, just comfortable and consistent.
Why Is My Foundation Chain Too Tight?
If your hook barely fits into the chain, you're not alone. Nearly every beginner makes their first foundation chains too tight.
Fortunately, it's an easy problem to fix:
You're Pulling the Yarn Too Tightly
Many beginners naturally pull on the working yarn after every chain.
Instead, let the hook determine the size of each stitch. After pulling through, leave the new loop resting naturally against the widest part of the hook before making the next chain.
Don't tighten each chain around the narrow neck of the hook.
Relax Your Hands
Crochet should feel comfortable. If your hands, wrists, or fingers feel tense, you're probably gripping the hook or yarn more tightly than necessary.
Try loosening your grip and letting the hook glide through each stitch.
Use a Larger Hook for the Foundation Chain
This is one of my favorite tips for beginners.
If your pattern calls for a 5 mm hook, make your foundation chain with a 5.5 mm or 6 mm hook.
Once your chain is finished, switch back to the recommended hook size before starting Row 1.
This creates a stretchier foundation without changing the rest of your project.
Should You Start Over?
If you can't comfortably insert your hook into the chain, it's usually worth starting over.
The foundation chain is the base of your project, and a few extra minutes now will make the rest of your crochet much more enjoyable.
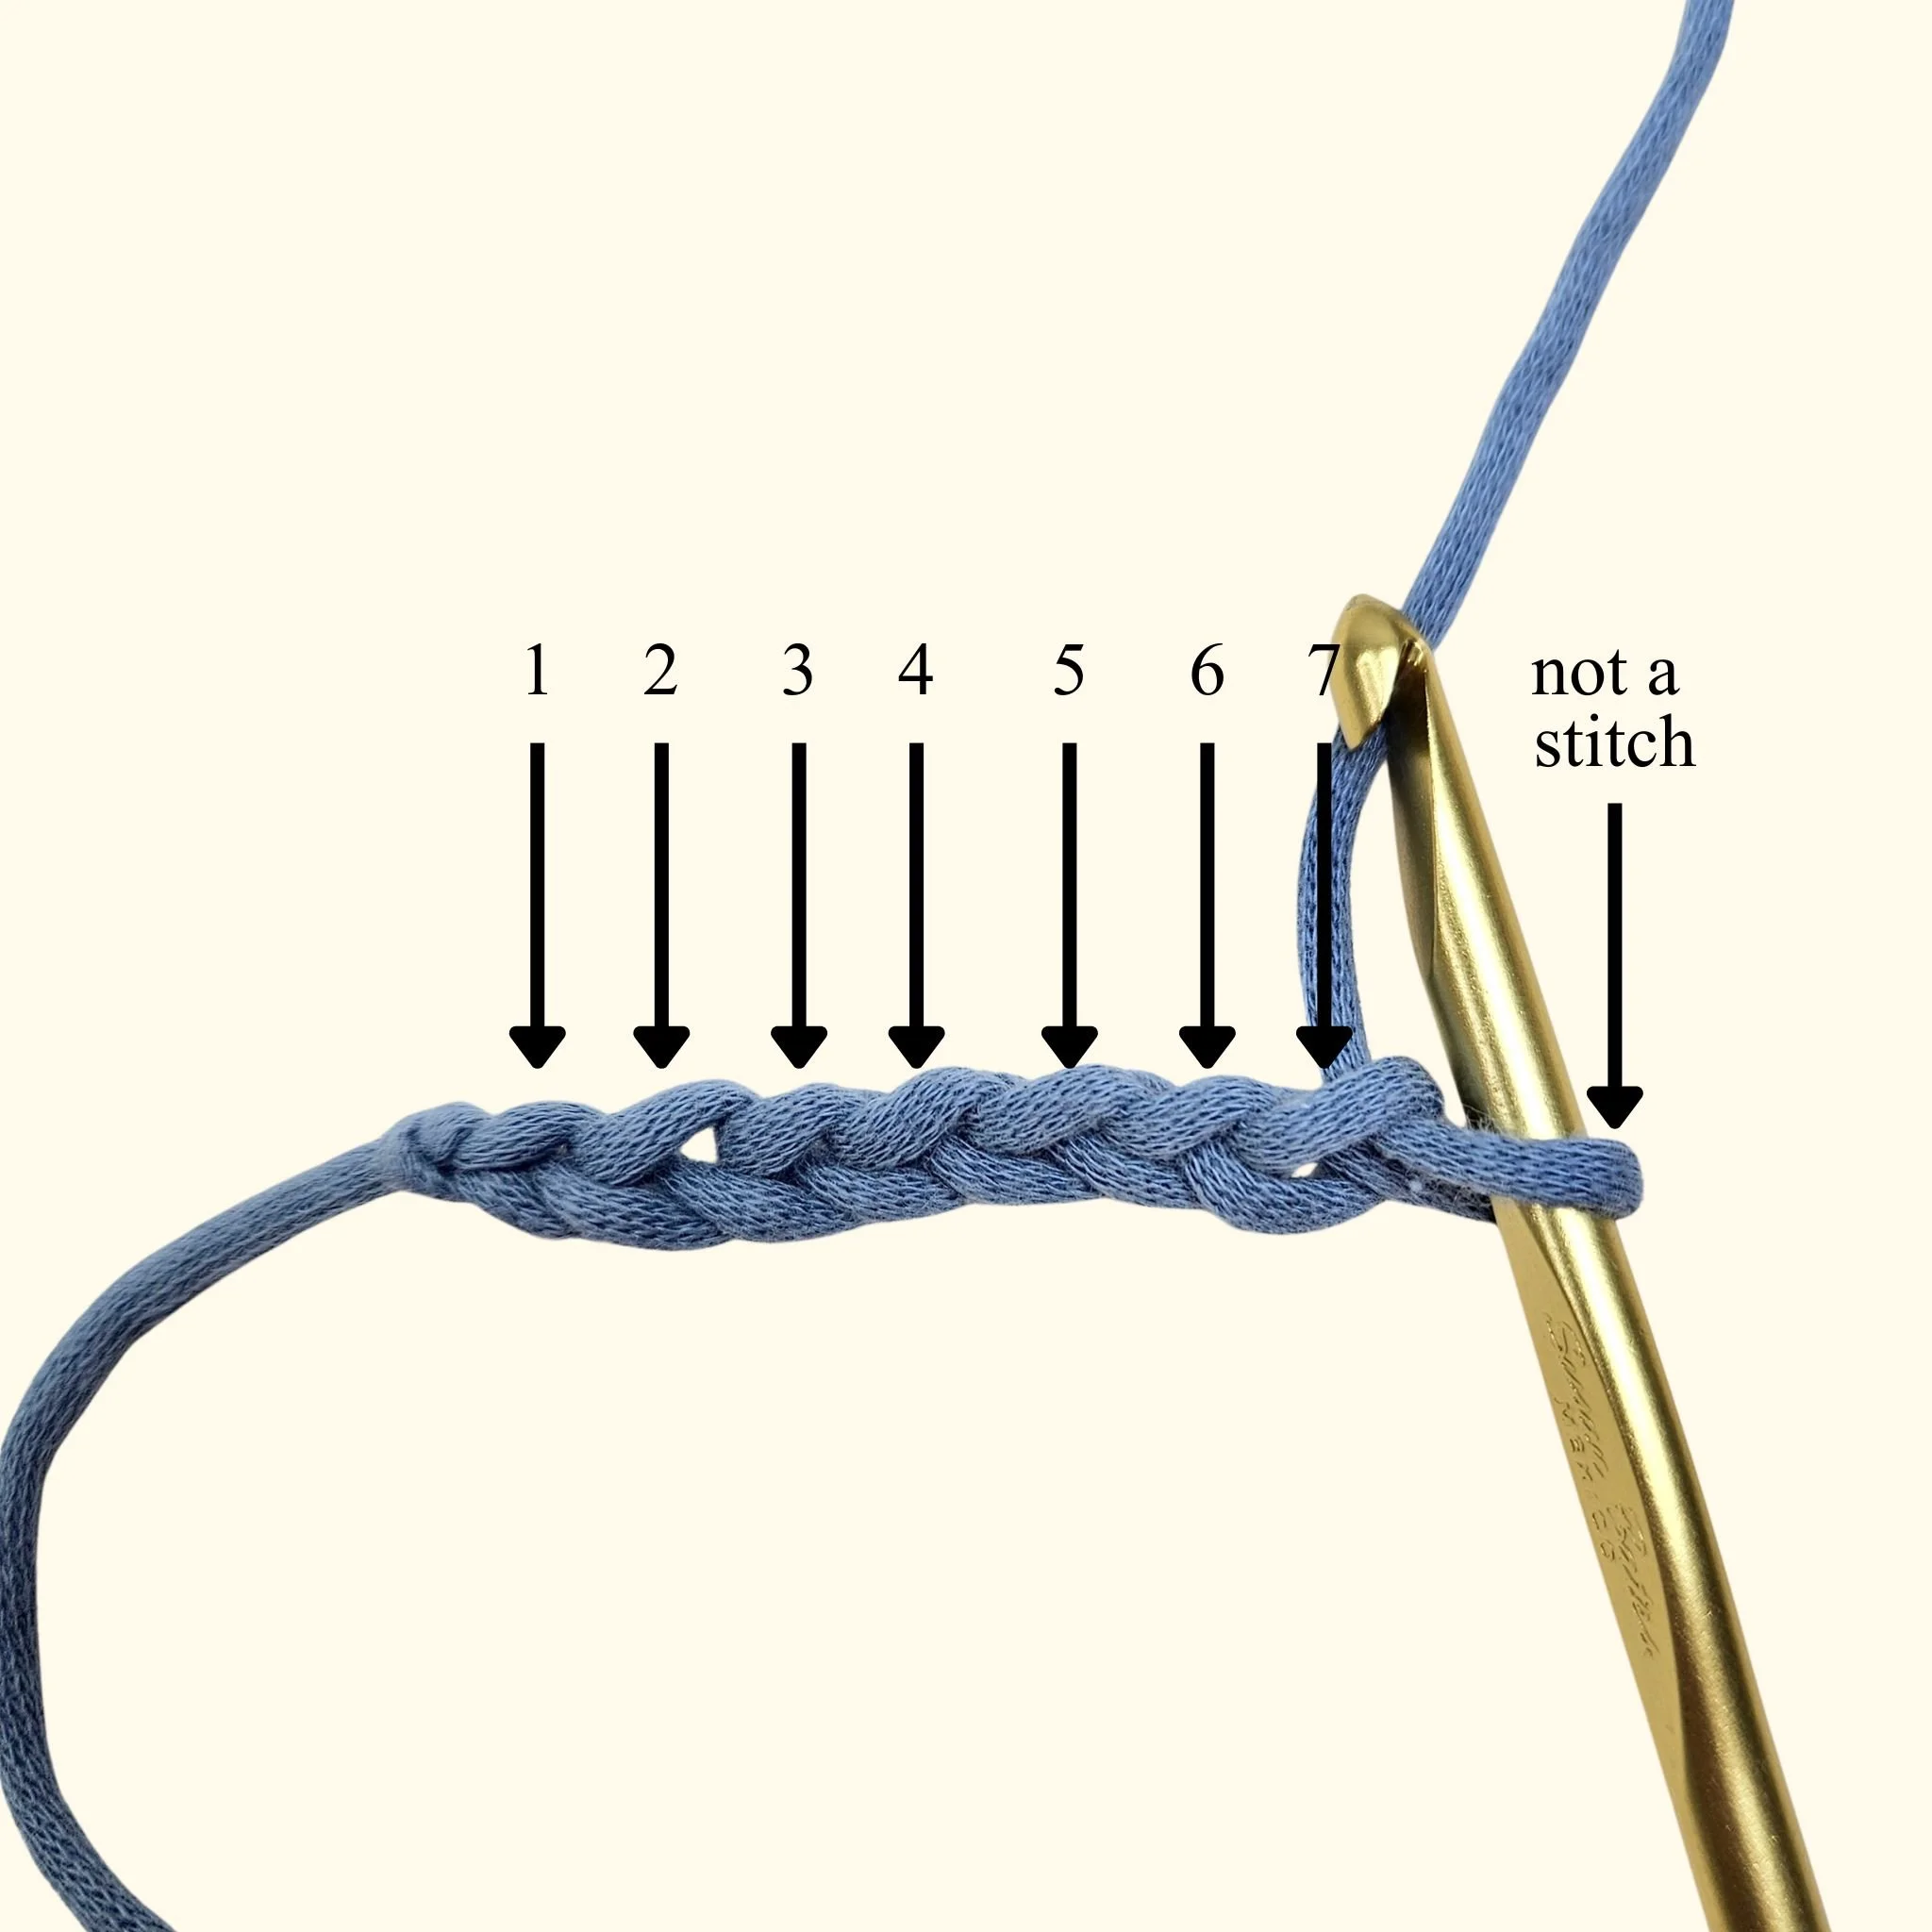
How to Count Your Foundation Chain
Before starting your first row, count your chains.
Lay the chain flat and count each V-shaped stitch.
Don't count the loop that's currently on your hook. The loop on your hook is only there to continue crocheting and is never counted as a stitch.
Checking your stitch count now is much easier than discovering a mistake several rows later.
Working Into Your Foundation Chain
Once you've finished your foundation chain, you're ready to begin the first row.
Most crochet patterns will tell you to work into the second chain from the hook or another specific chain depending on the stitch you're making.
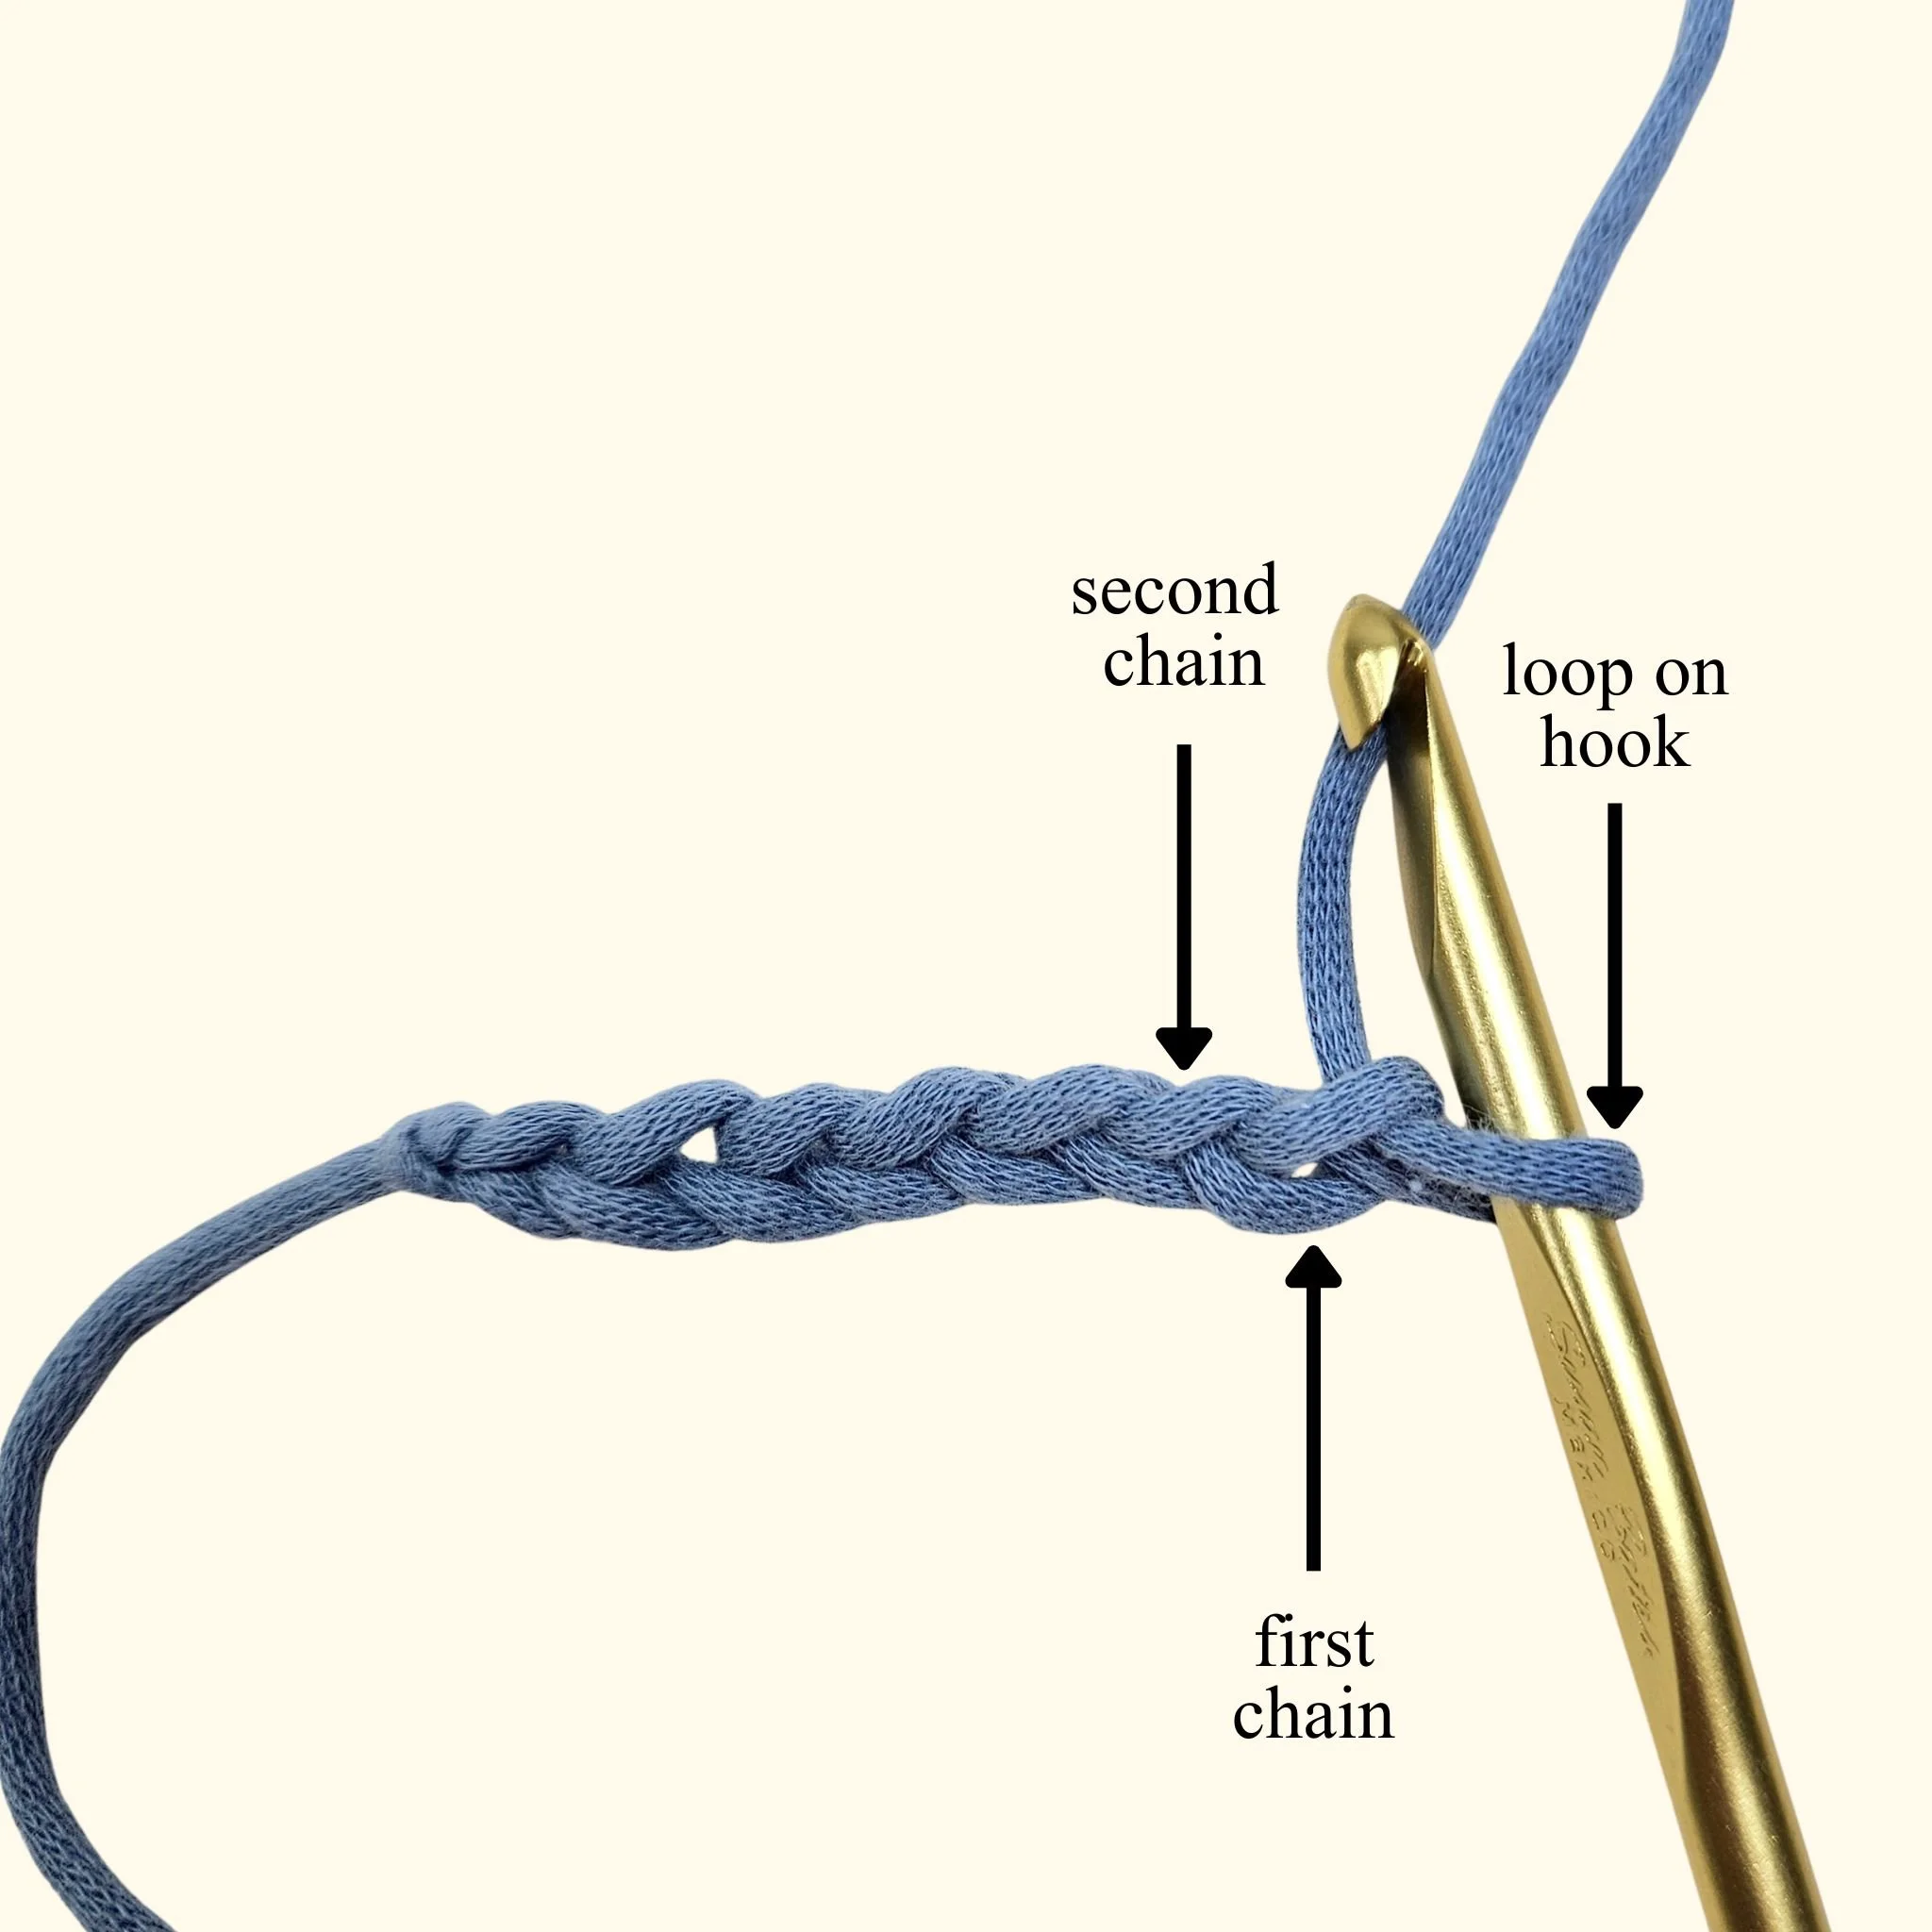
Remember, the loop on your hook is not the first chain. Count back from the hook until you reach the chain your pattern specifies.
Where Do You Insert Your Hook?
There are two common ways to work into a foundation chain. Neither is right or wrong, they simply create a different finished edge.
If your pattern tells you where to insert your hook, always follow those instructions.
Working Under the Top Two Loops
This is the traditional method and the one you'll find in many beginner crochet patterns.
Insert your hook under the two loops that form the V-shaped chain stitch.
It's easy to identify, making it a great choice when you're first learning to crochet.
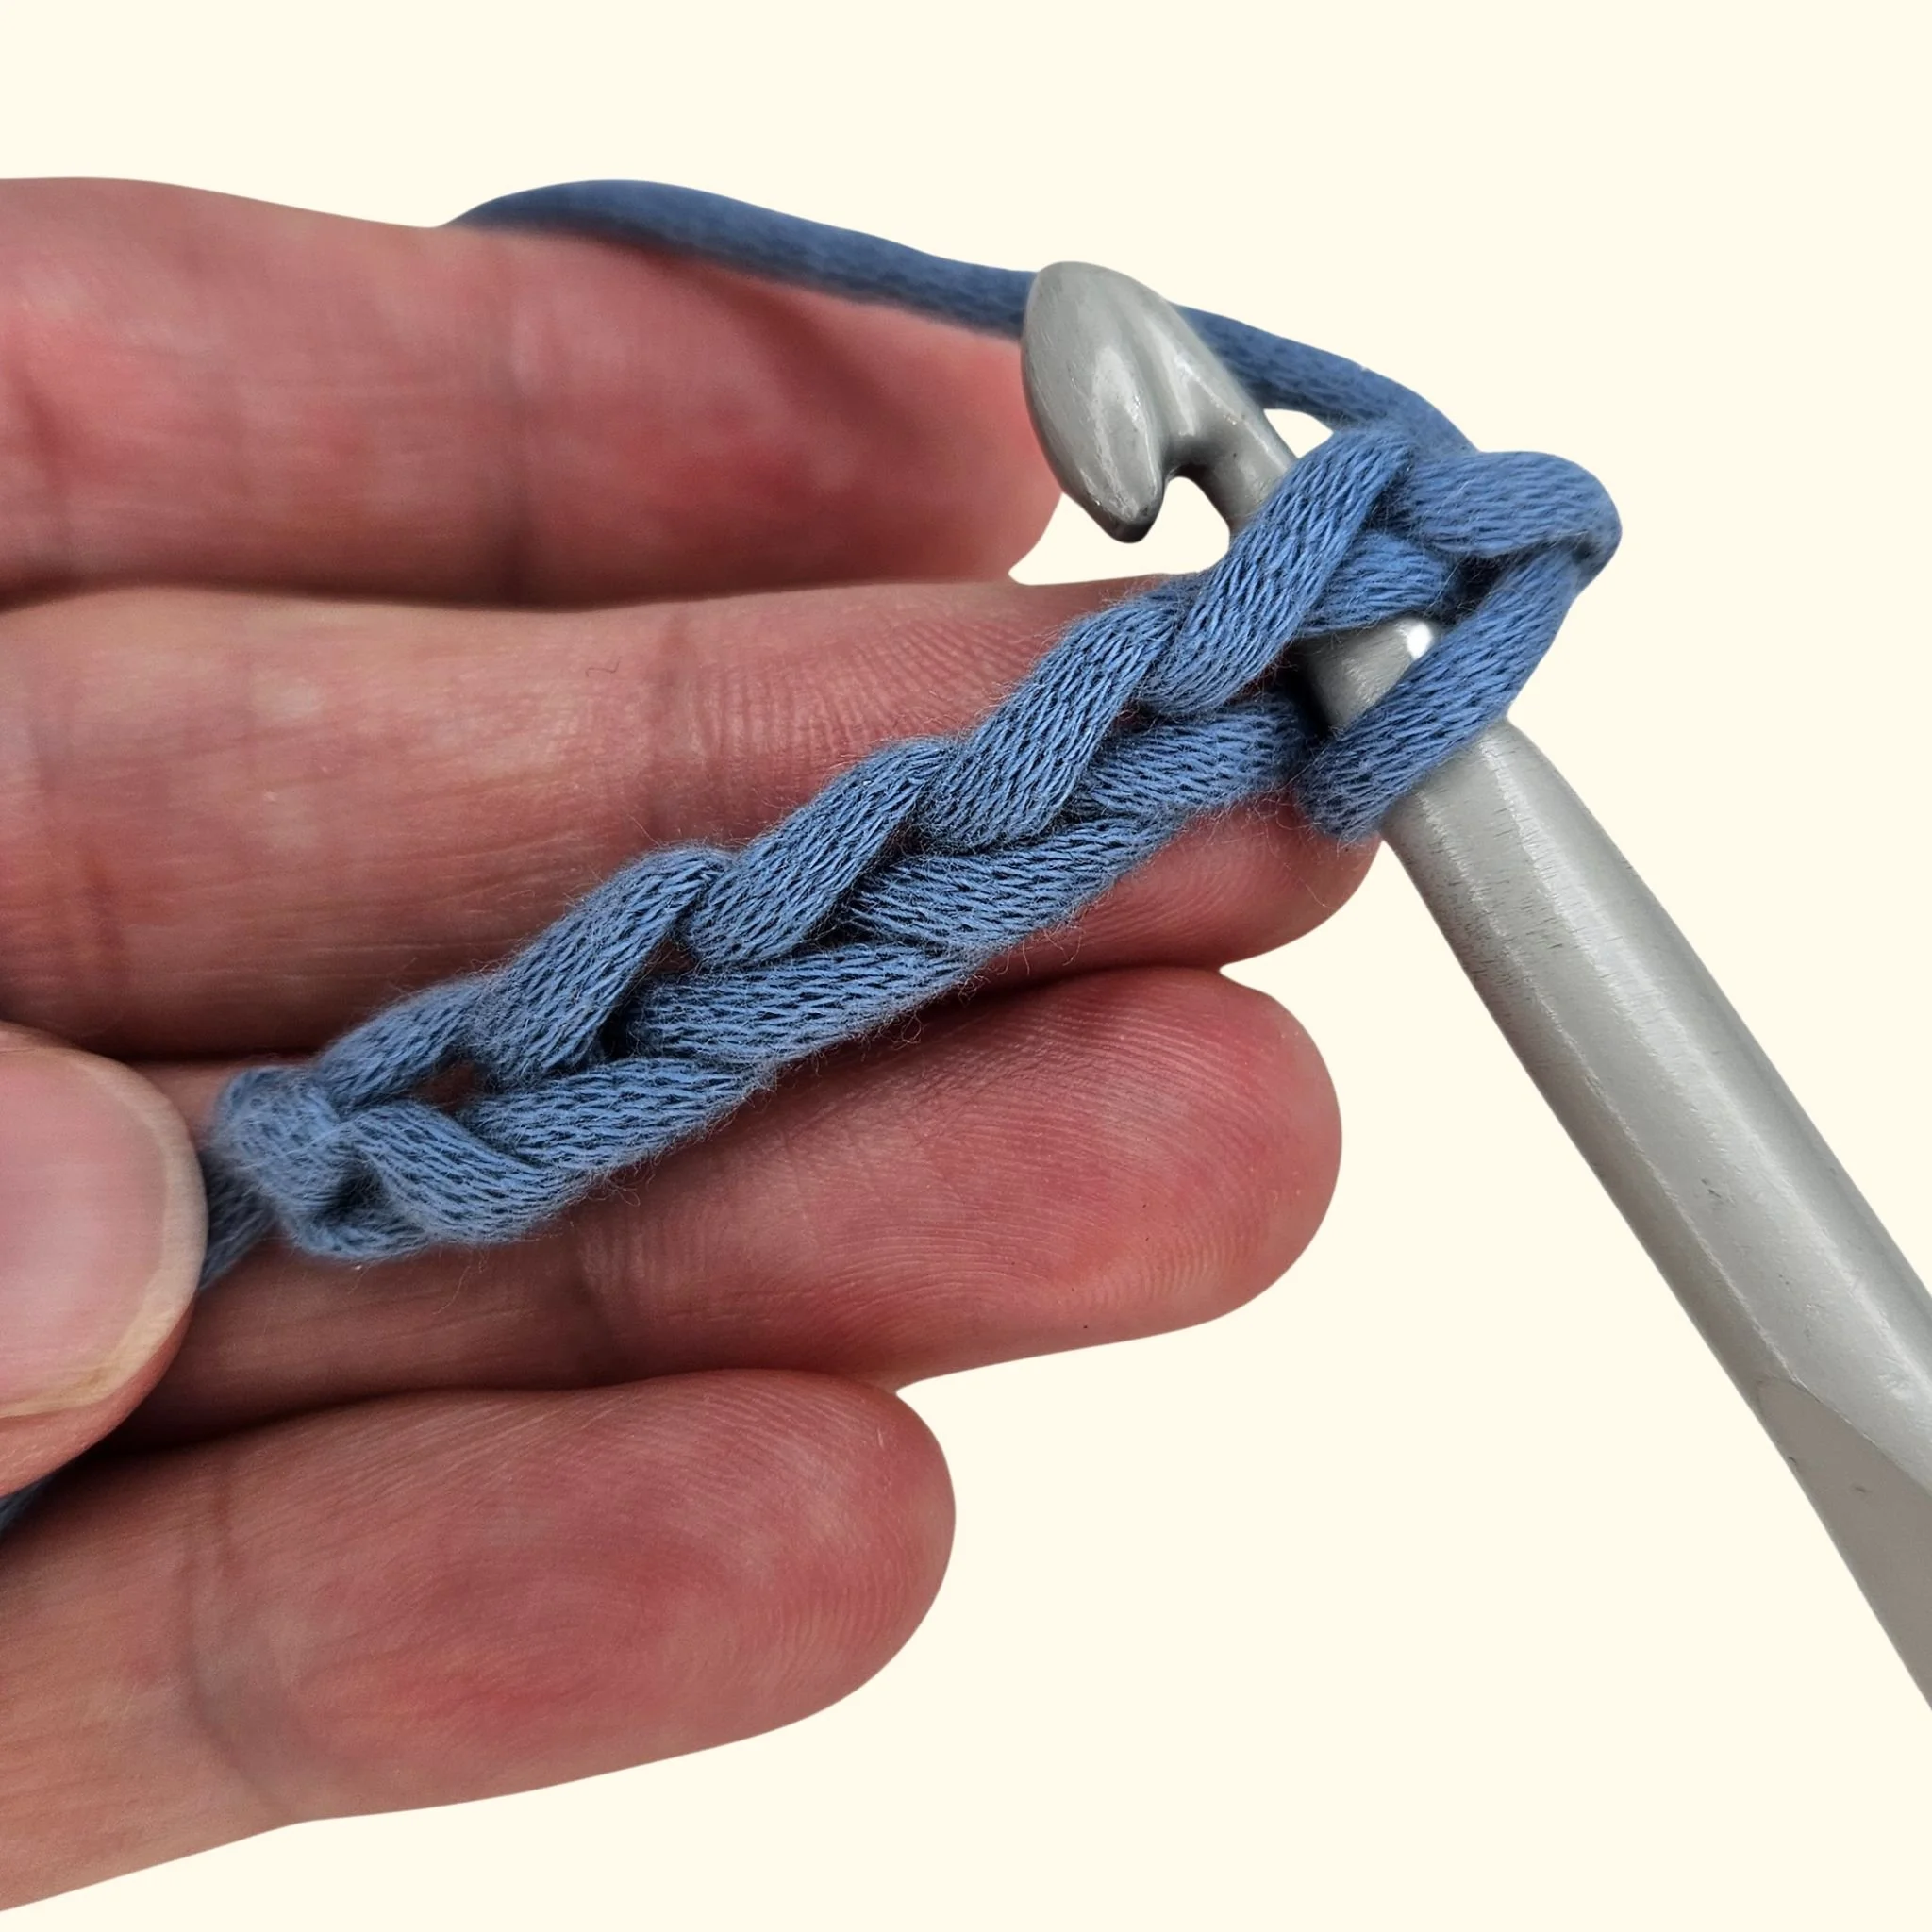
The finished bottom edge after crocheting into the top two loops:
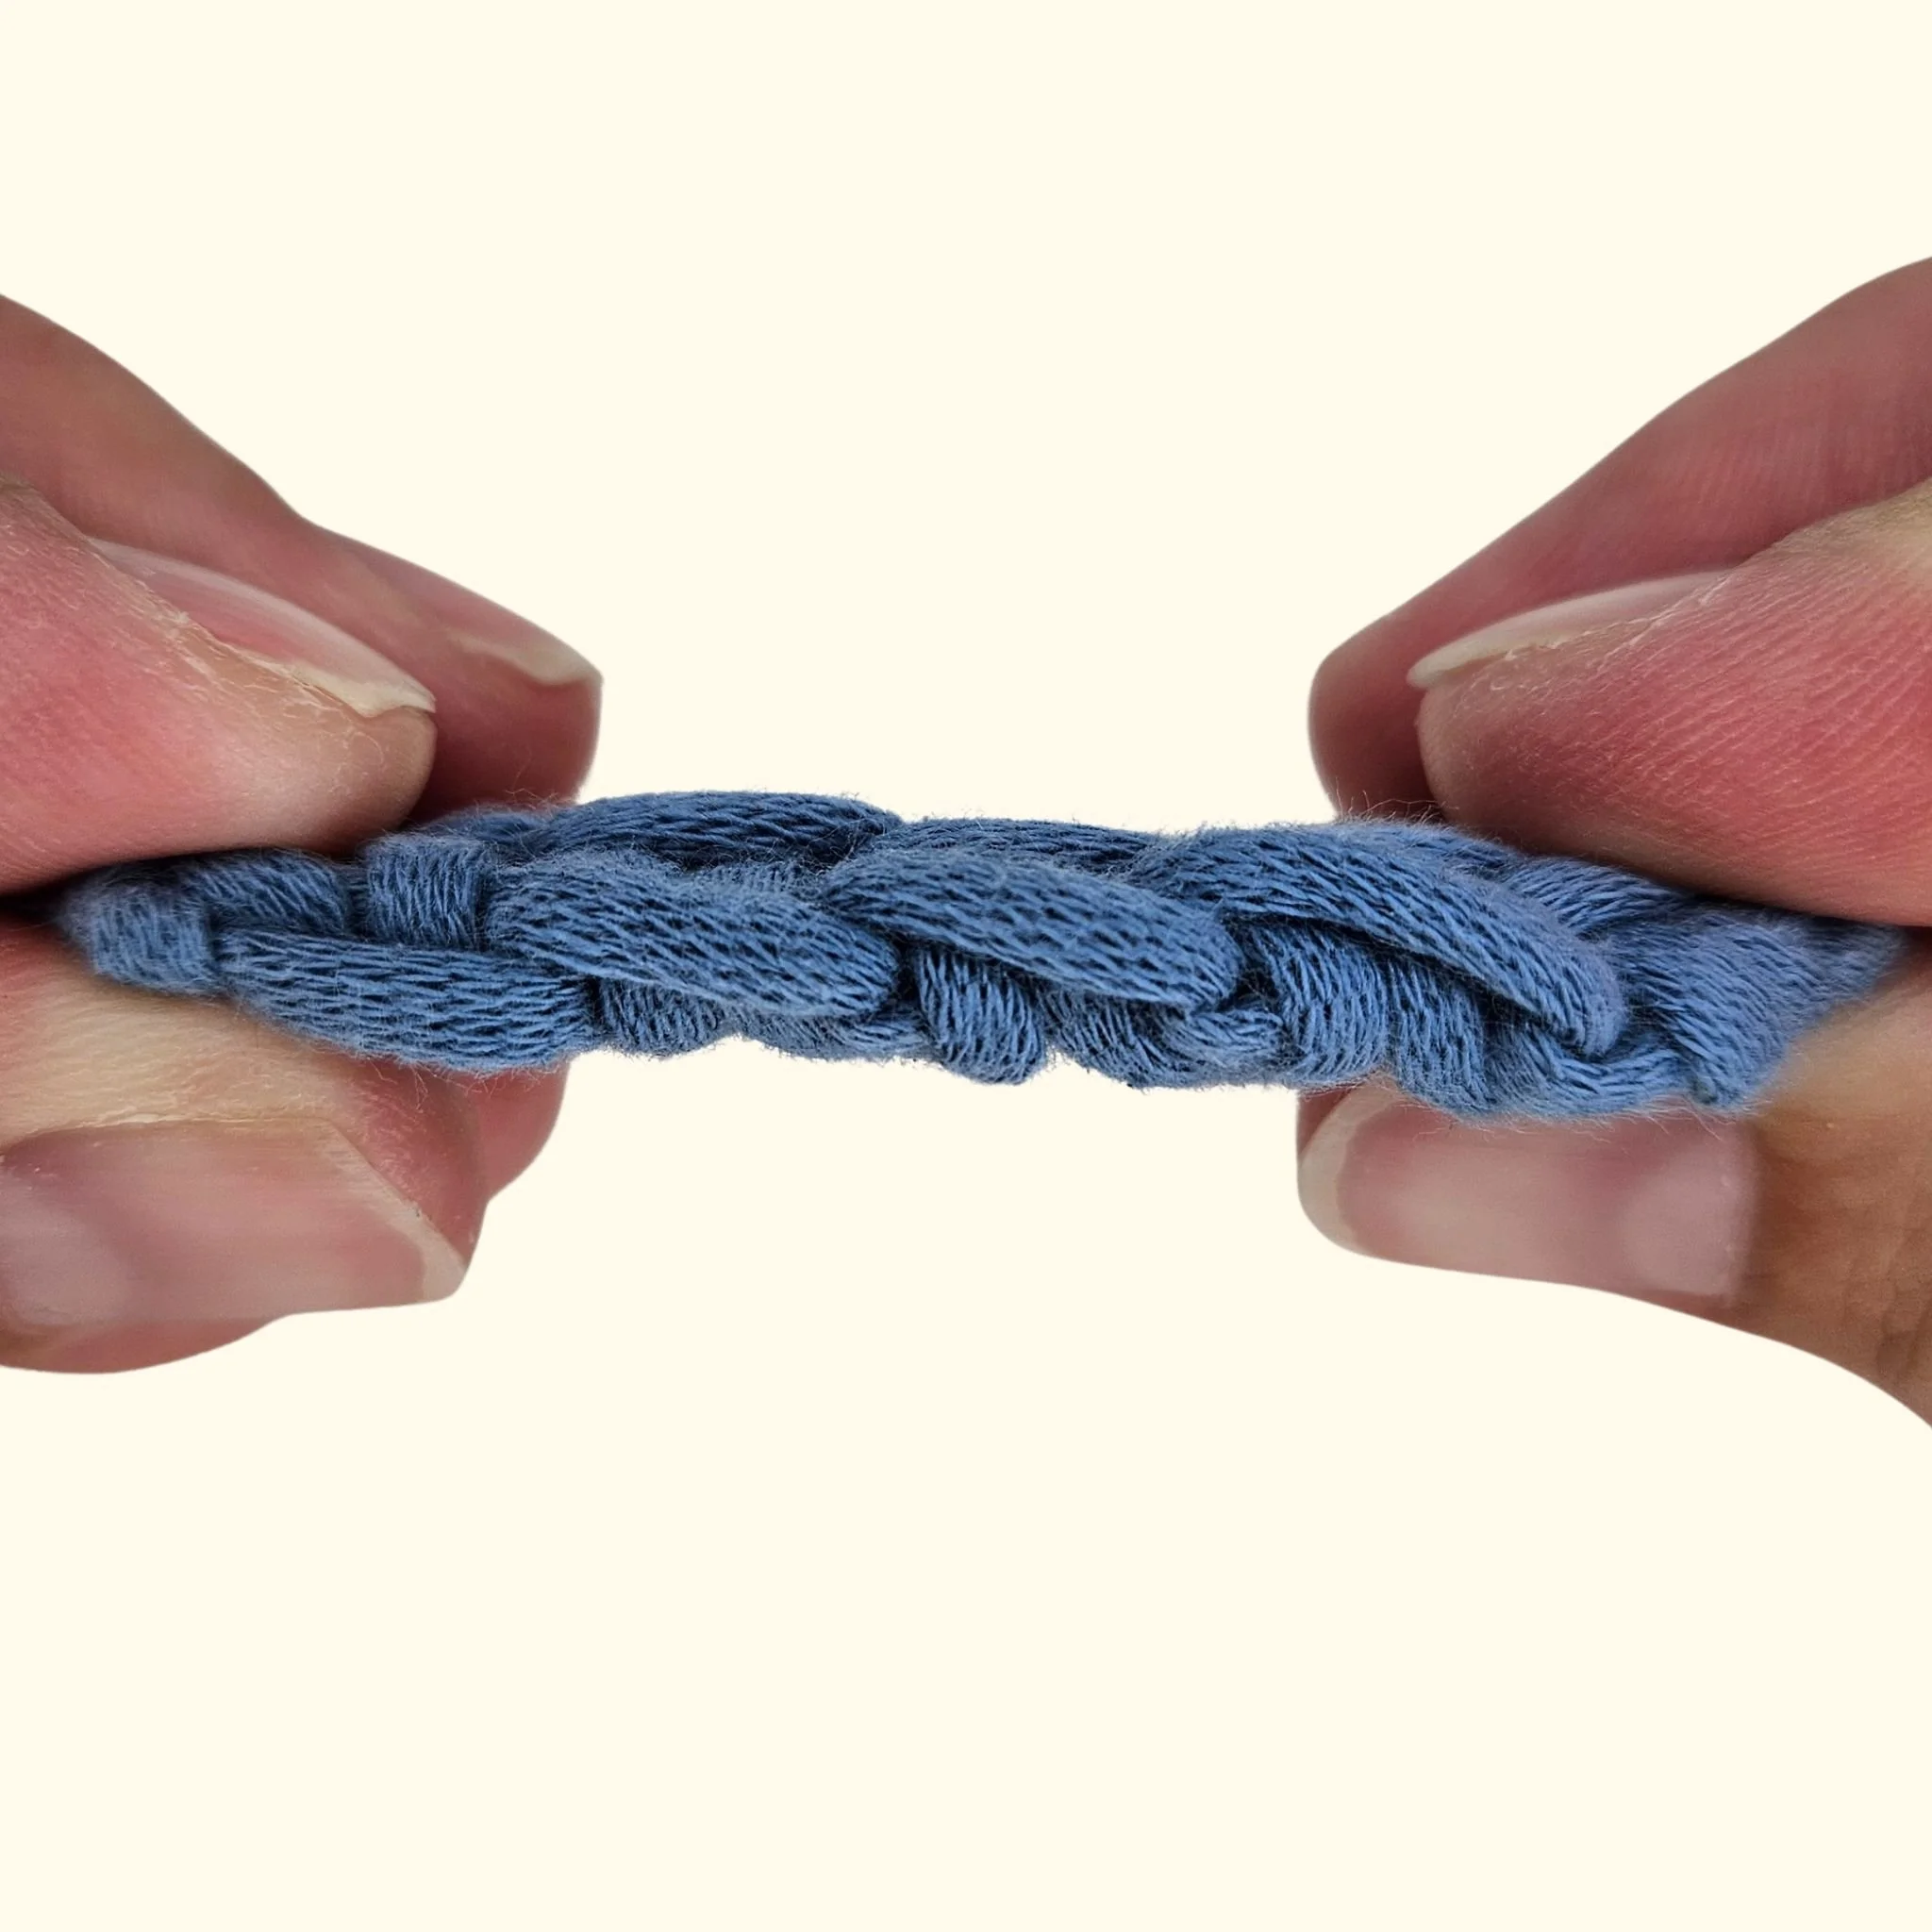
Working Into the Back Bump
The back bump (also called the back bar) is the single loop running along the back of the foundation chain.
Instead of inserting your hook under the top loops, insert it into this back bump.
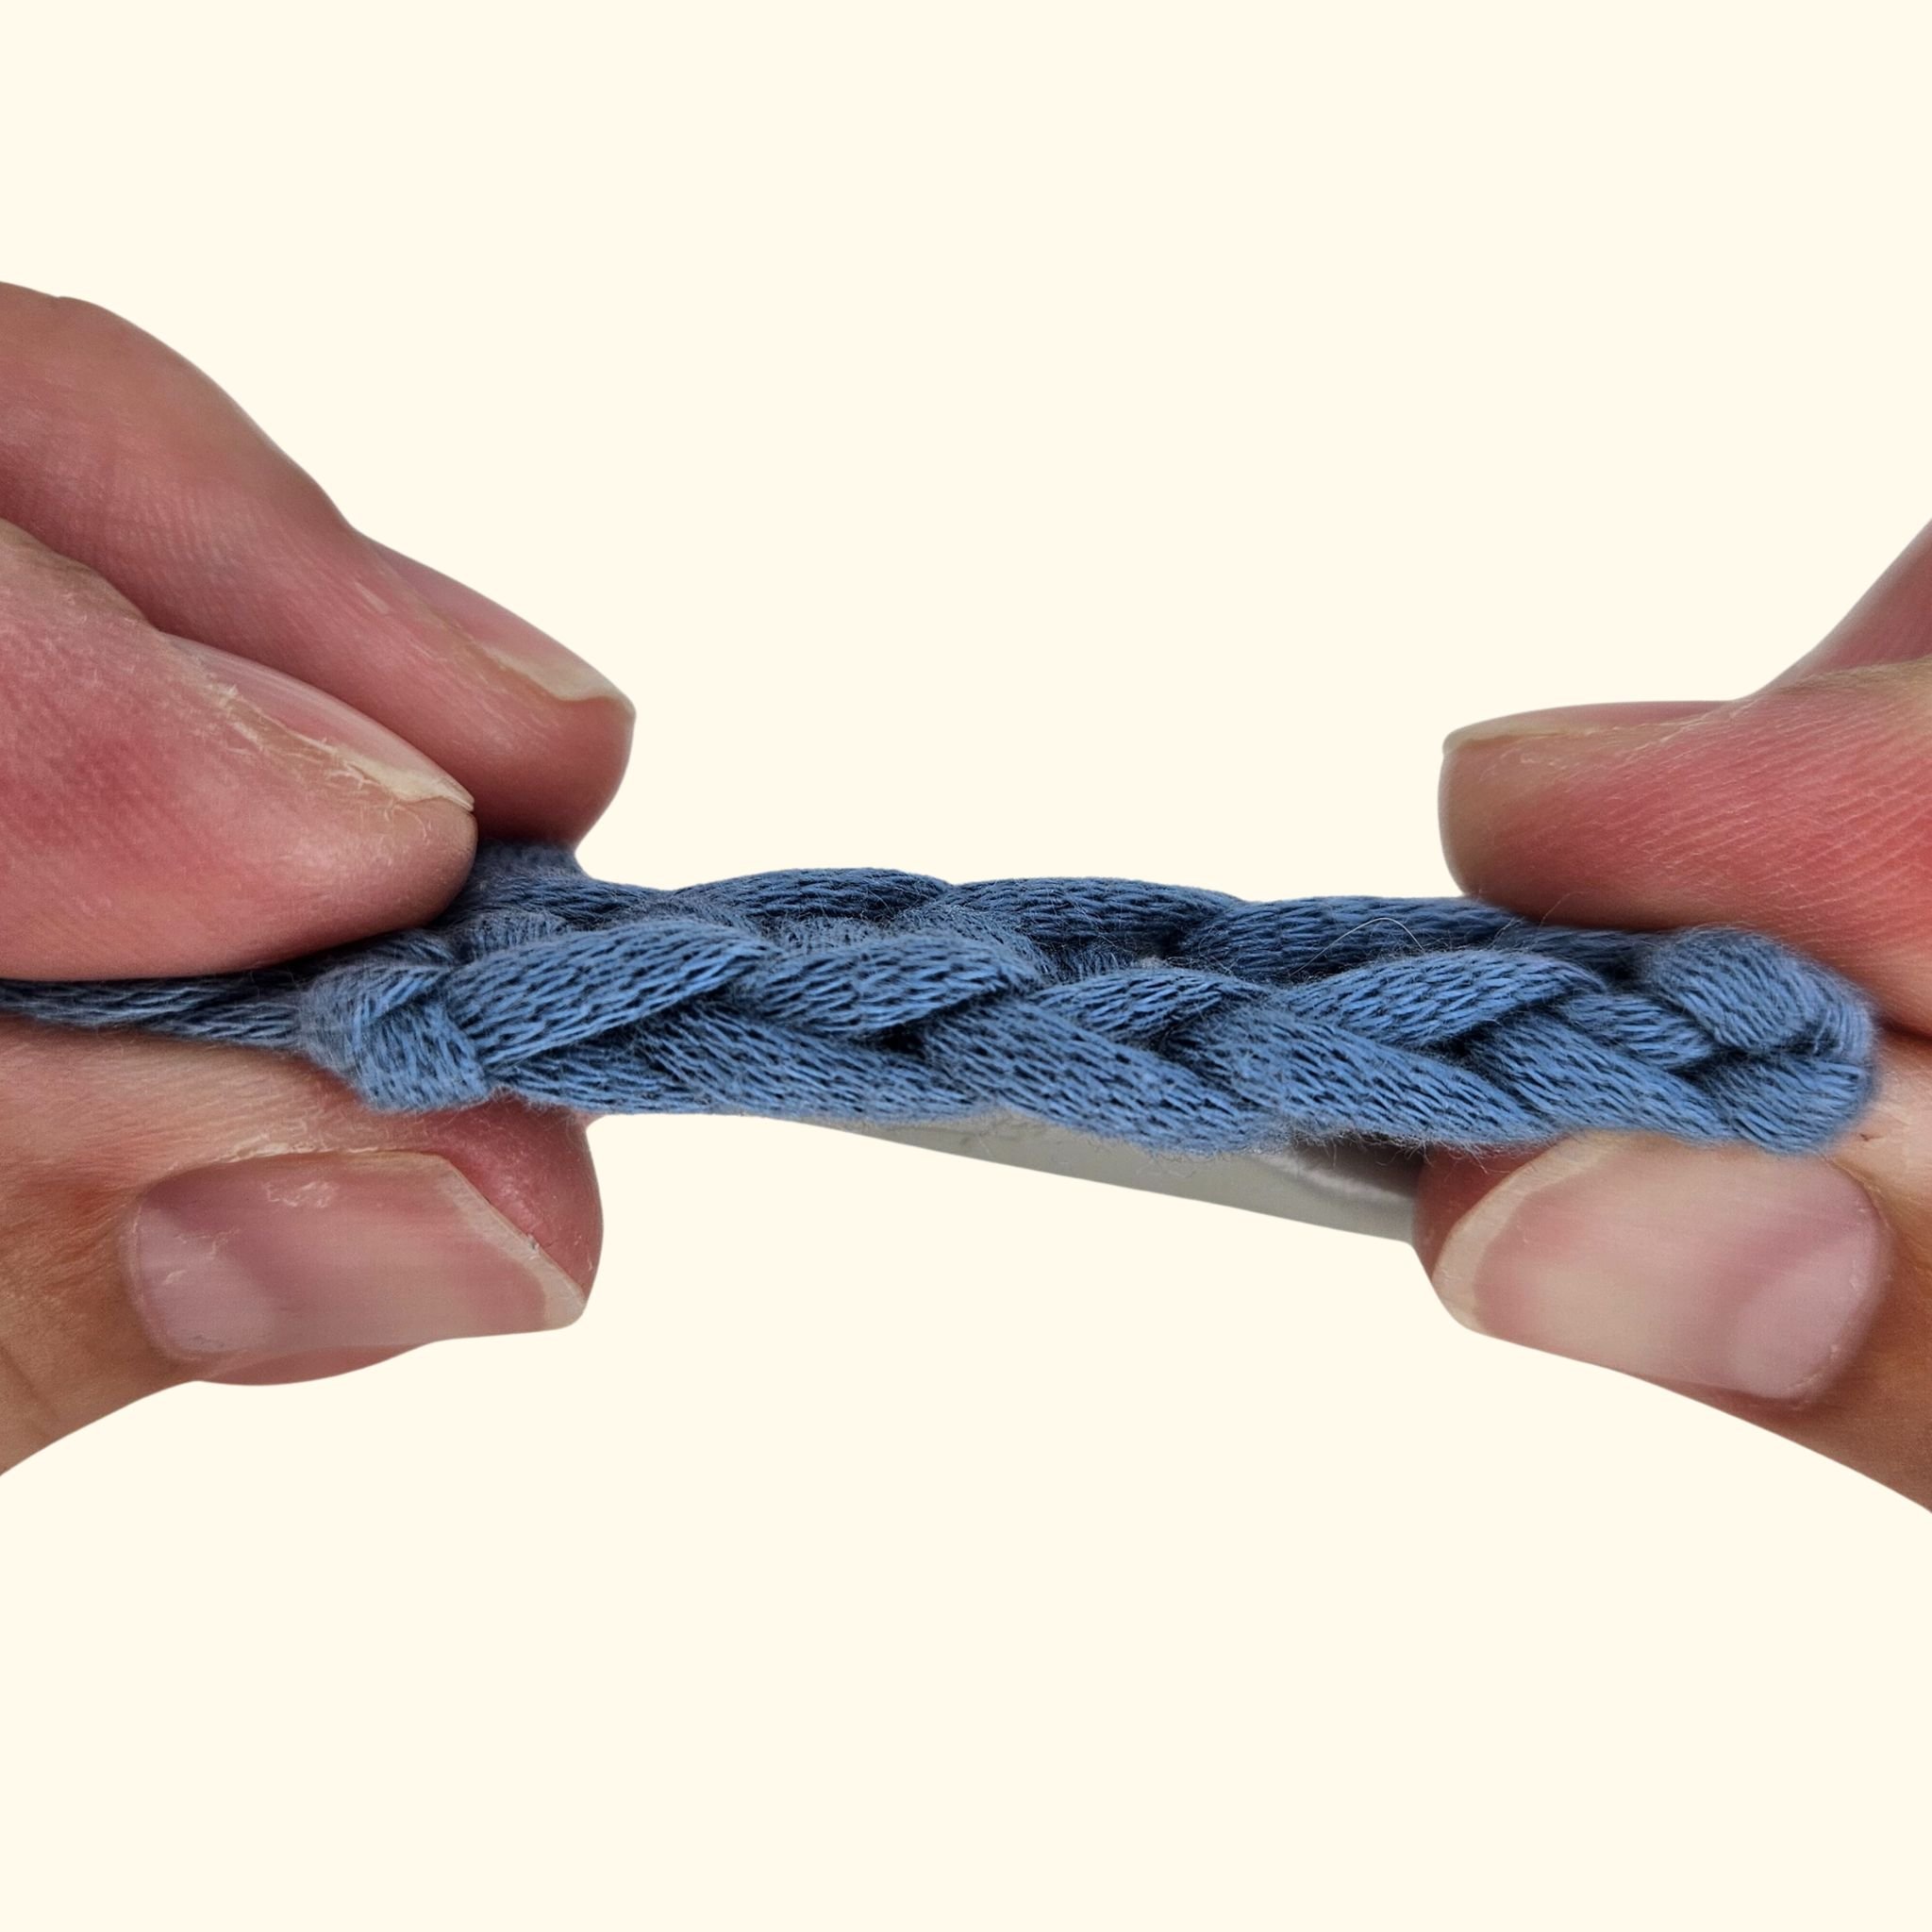
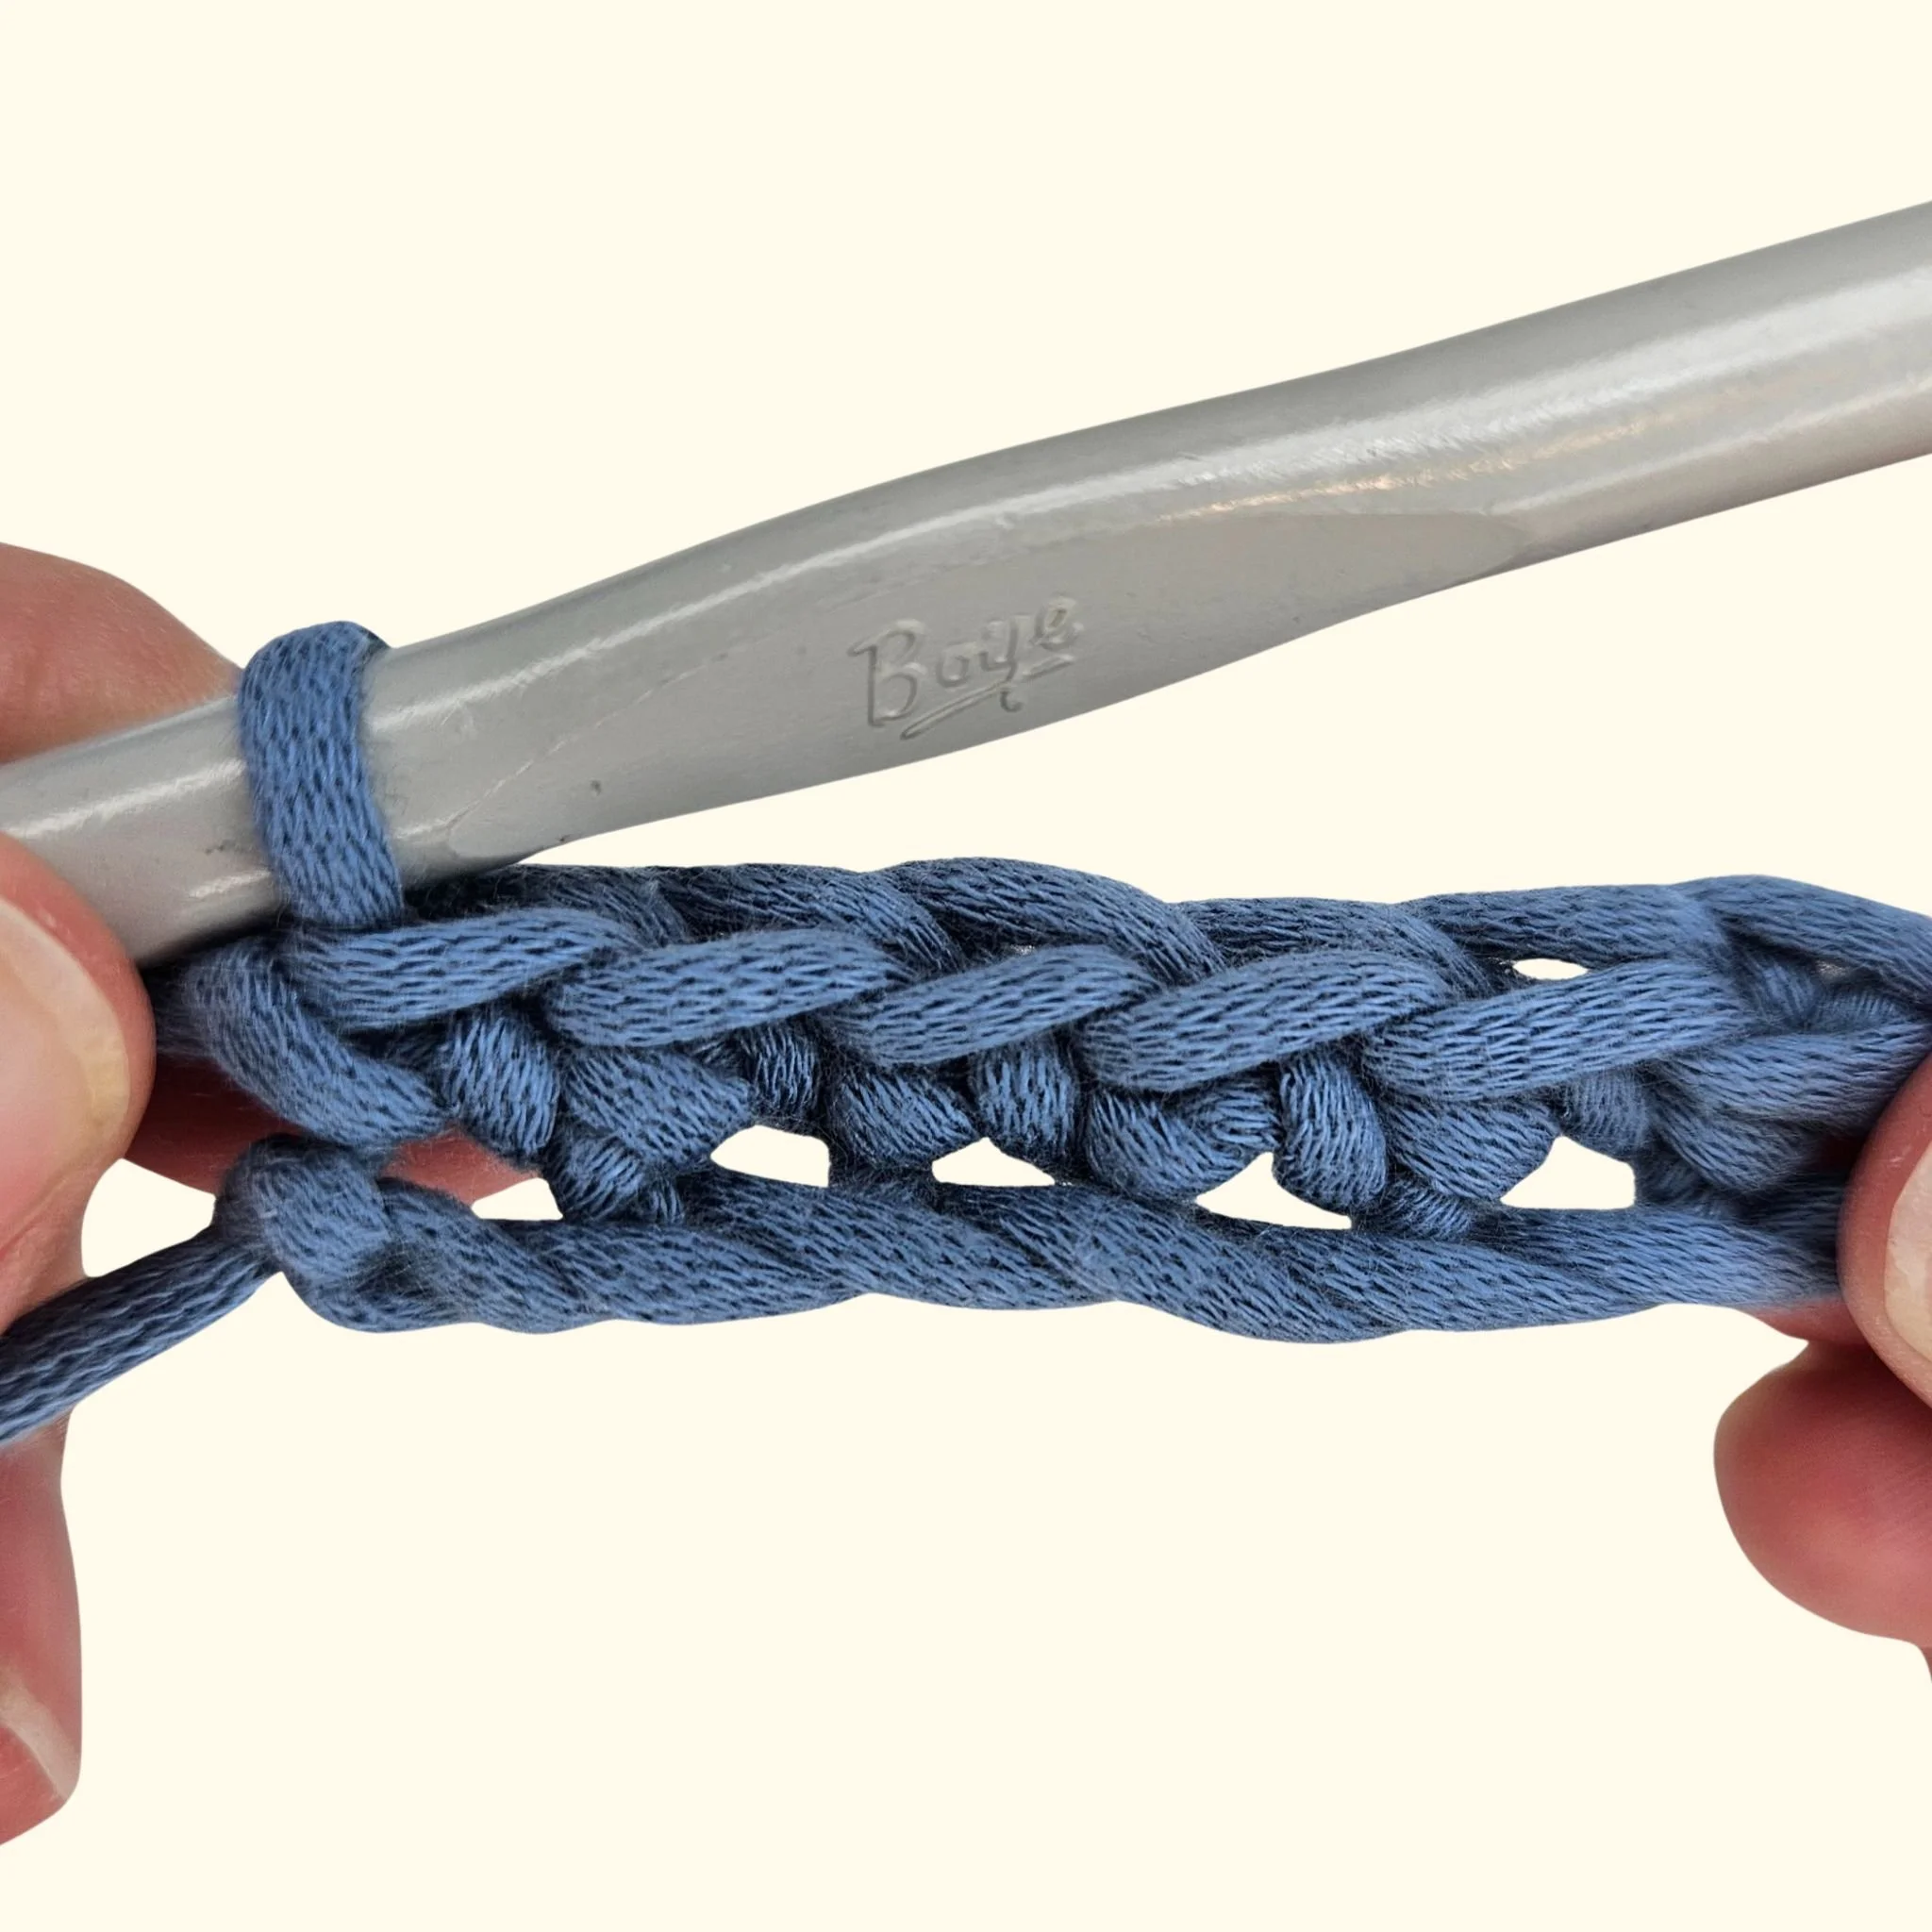
This method because it creates a foundation that looks similar to the top “V” of a crochet stitch that closely matches the top edge.
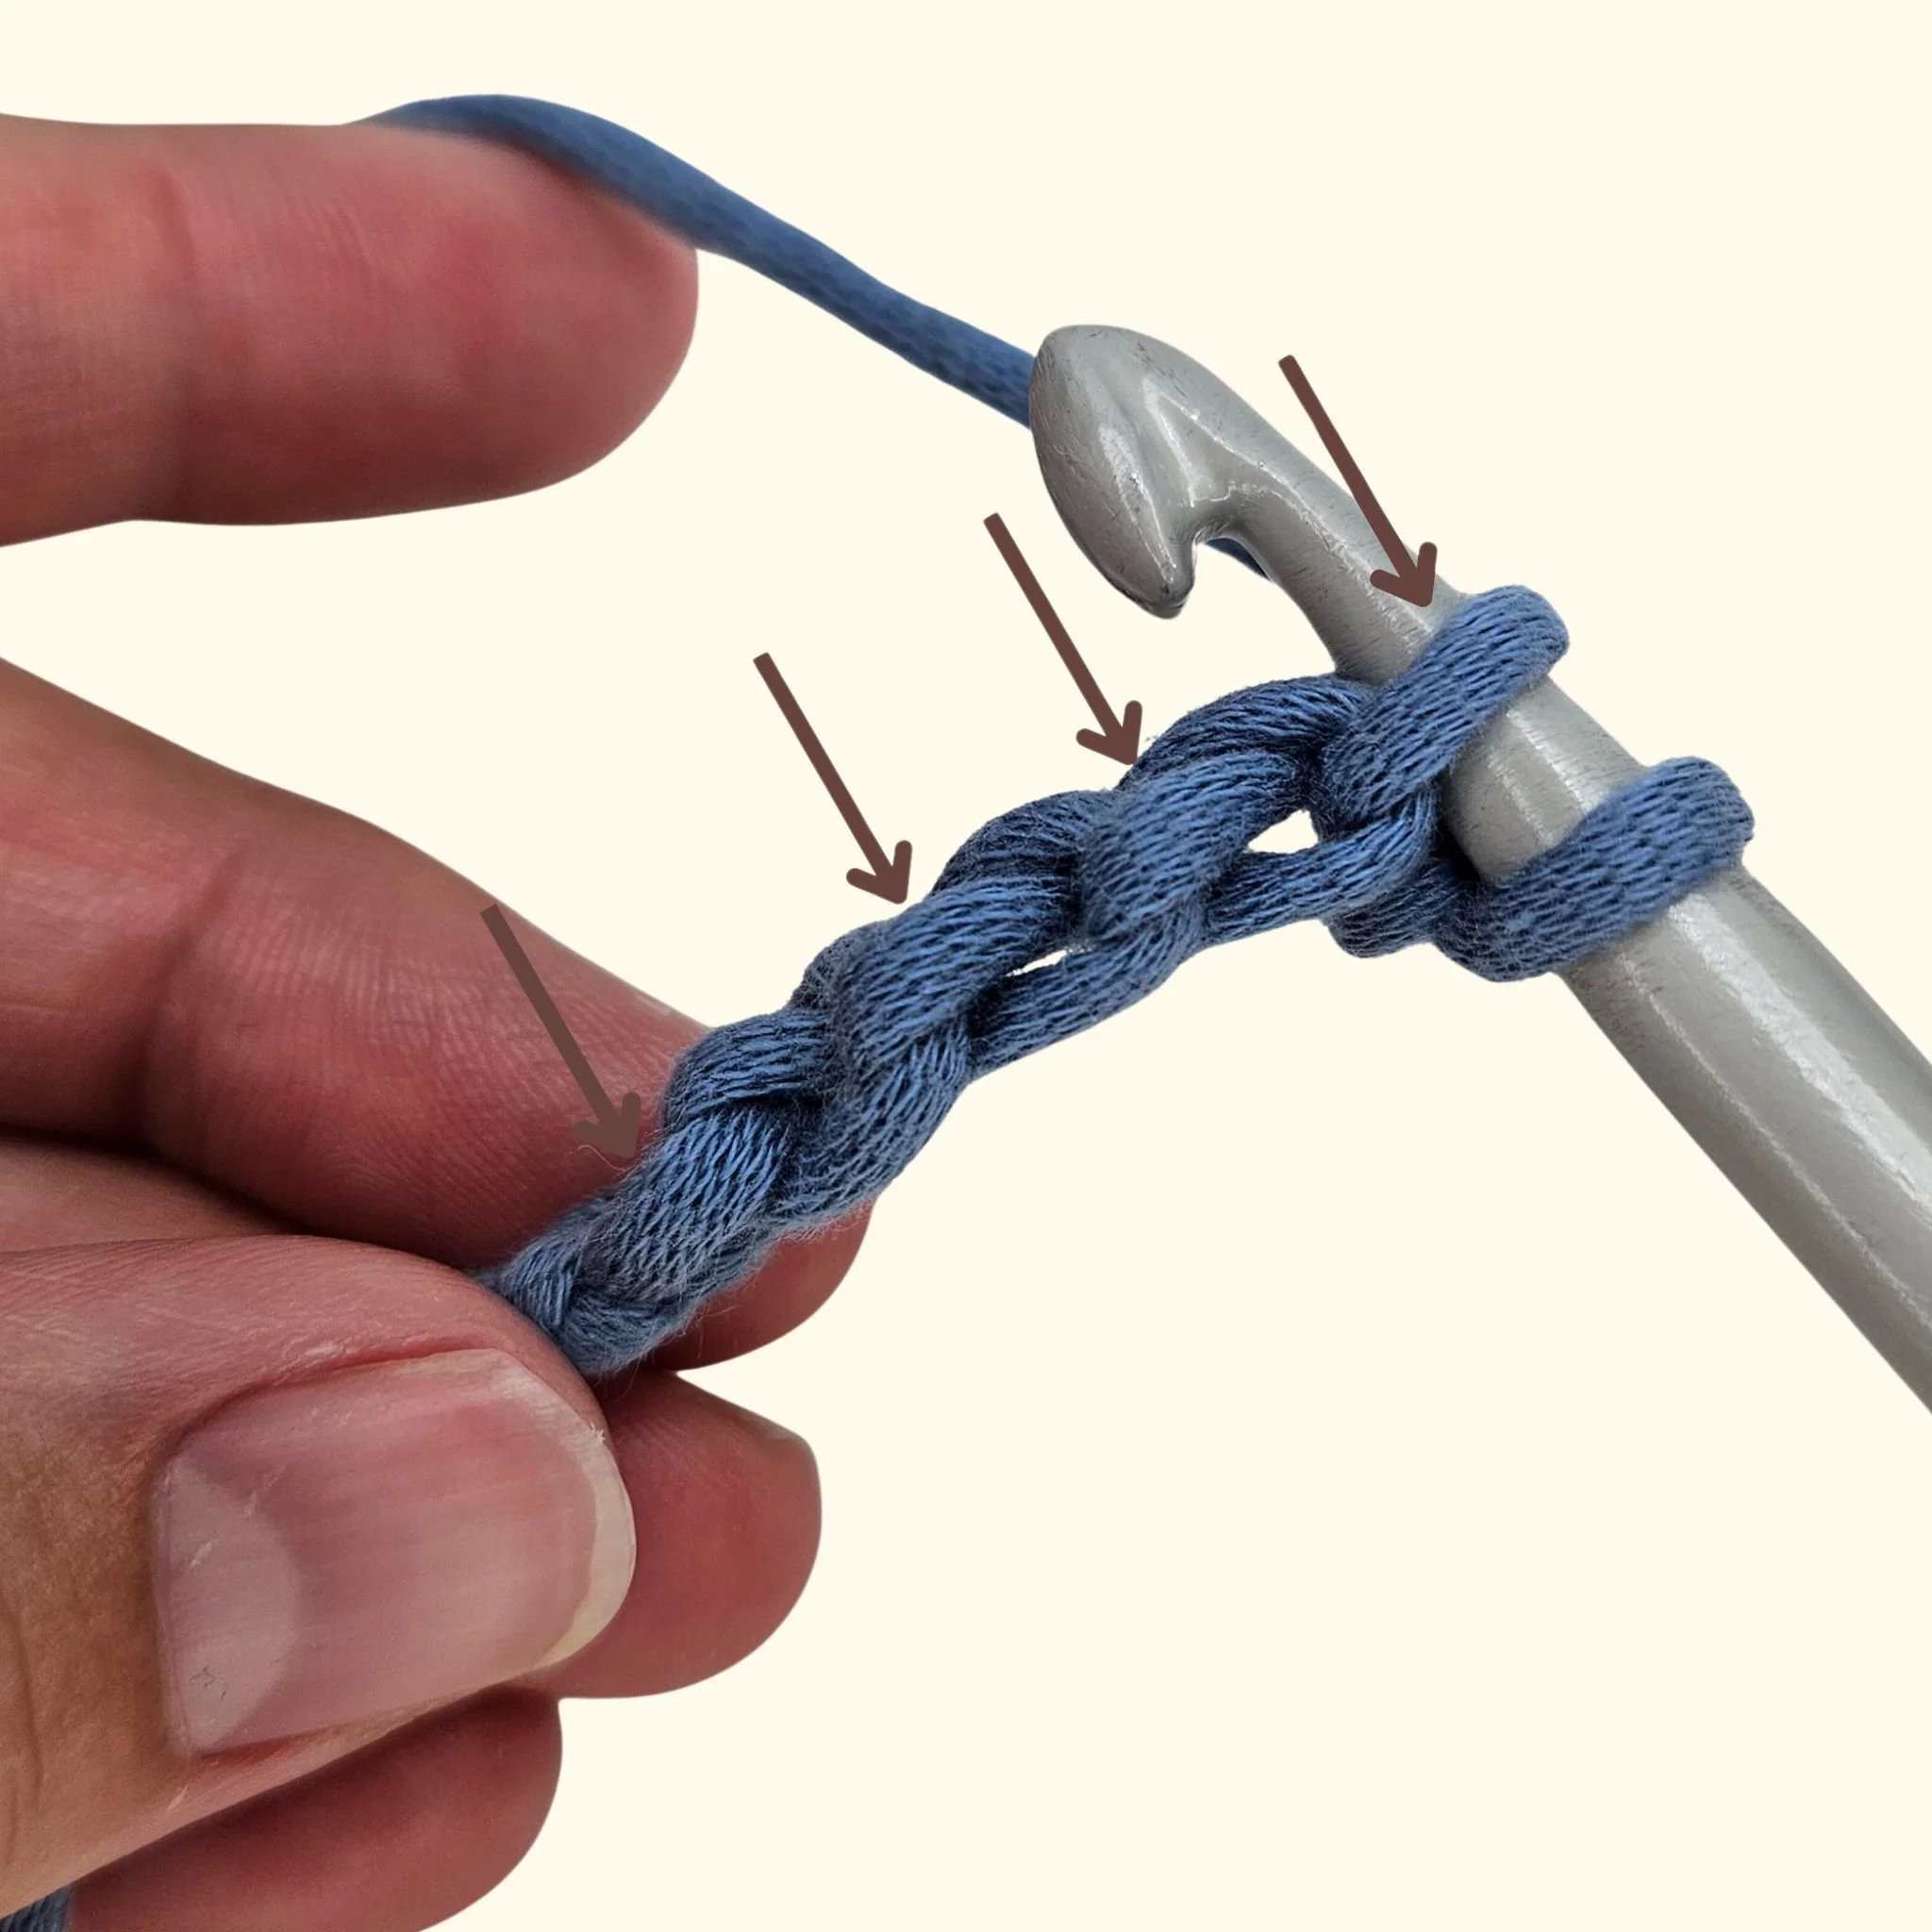
the finished bottom edge after crocheting into the back bump. Notice how the V-shaped chain stitches remain visible, creating an edge that looks like the top of crochet stitches.
Avoid This Common Mistake
Unless your crochet pattern specifically tells you otherwise, don't insert your hook under just one of the top loops. Working under a single loop can create a weaker edge and may change the appearance of your finished project.
Instead, work under both top loops or into the back bump, depending on what your pattern instructs.
Common Beginner Mistakes
My Foundation Chain Is Twisted
Before beginning your first row, lay the chain flat and make sure all of the V-shaped stitches face the same direction.
I Counted the Loop on My Hook
The loop on your hook is never counted as a stitch. Always begin counting with the first completed chain.
I Worked Into the Wrong Chain
It happens to everyone. Simply pull out the stitches, recount your chains, and try again. Crochet is very forgiving.
Frequently Asked Questions
Why is my foundation chain so tight?
Most beginners pull the yarn too tightly while making chain stitches. Relax your grip or use a crochet hook one size larger for the foundation chain before switching back to the recommended hook.
How loose should my foundation chain be?
Your hook should slide comfortably into every chain without forcing it. The chains should be even and flexible, not stiff.
Do I count the loop on my hook?
No. The loop on your hook is never counted as a stitch.
Should I crochet into the back bump or the top loops?
Follow your pattern. Both methods are correct, they simply create different finished edges.
Final Thoughts
The foundation chain is the starting point for almost every crochet project, so don't worry if it takes a little practice.
Focus on making relaxed, even chains rather than perfect ones. As your hands develop muscle memory, your tension will become more consistent and working into your foundation chain will feel much easier.
Continue Learning
If you're learning crochet on your own, continue with the next lesson in the Learn to Crochet series: How to Single Crochet.
Taking the email course? Your next lesson and practice assignment will be in your next email.